A quick post on calibrating color for photographing paintings. I wrote a longer post in 2014 on photographing paintings with a DSLR using a Colorchecker Passport, Adobe DNG profiles and Adobe Lightroom. That system has worked well for me for the last couple of years, but recently I wanted to use Phase One’s Capture One Pro as I find it to be superior to Lightroom for my needs. The problem I previously had with Capture One was that it doesn’t use the DNG profiles that the Colorchecker Passport software creates.
The only solutions I had found for making ICC profiles were very expensive. The oft-recommended PictoColor InCamera is a ten-year-old plug-in that sells for $200. You then have to find a copy of Photoshop 5.0 to use it with as it’s still 32-bit. There are a couple of other solutions that cost even more.
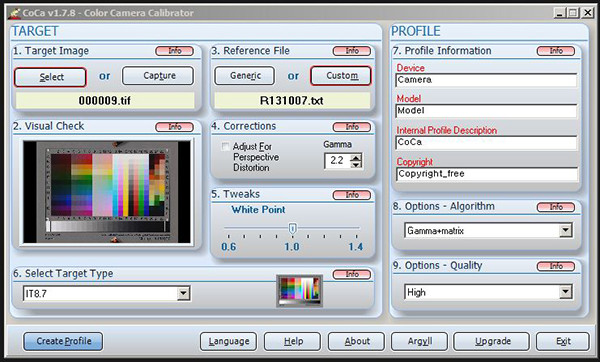
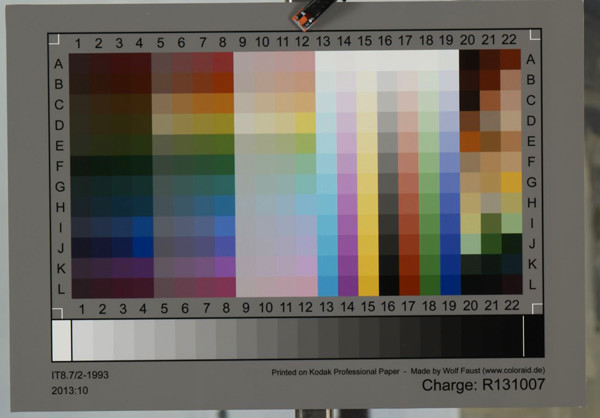
Enter CoCa, the freeware ICC Color Camera Calibrator. The software works with a number of physical color reference cards. One inexpensive one that I picked up ($30 plus shipping) is the IT 8.7 Calibration Target from Wolf Faust at coloraid.de. It’s the C1 order number on his website (it says it’s for cameras, not scanners) and the package comes with the printed target as well as a CD with the reference files.
The IT 8.7 target from Coloraid.de.
The CoCa webpage has instructions for the software but to sum it up briefly: You first photograph the calibration target under your lighting set-up, then crop it and save it as a TIFF file in your camera’s software. Next, select the image in CoCa, then select the target type and the reference file from the Coloraid CD (R131007.txt). Finally, save the ICC profile in the proper folder so your software can use it (for Capture One it is explained here). You can then apply it to your paintings in whatever software you’re using. For Capture One it gets applied via the Base Characteristics box under the Color tab.
CoCa should work with the Colorchecker Passport too, though I haven’t tried it.
For those using OSX, you can run CoCa through Wine though the process is somewhat complex and requires that you’re either handy with command line interface of Terminal or, like me, reasonably good at following instructions and copying and pasting.
A few people I’ve discussed color calibration with have balked about the high prices for calibration gear. In my opinion, this works out to be a good solution for a bit of time and $35 ($40 in the US).
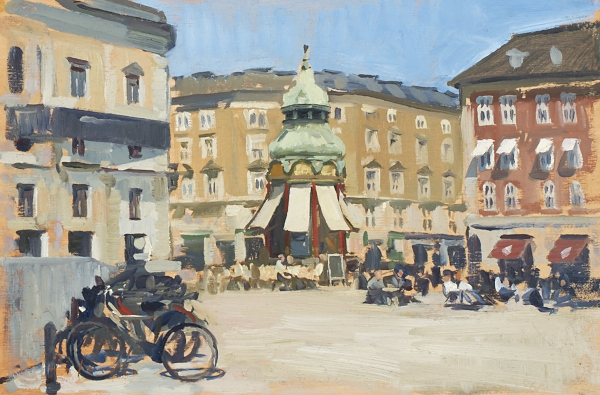
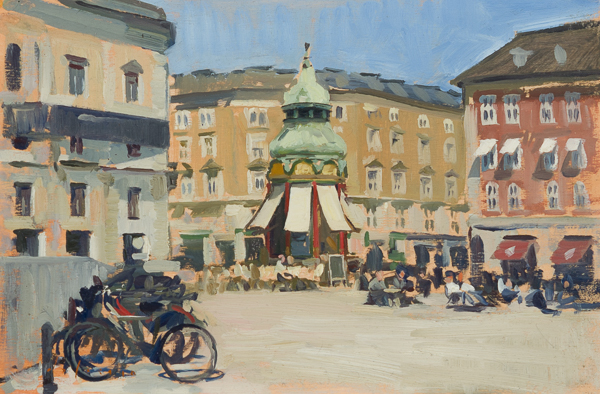
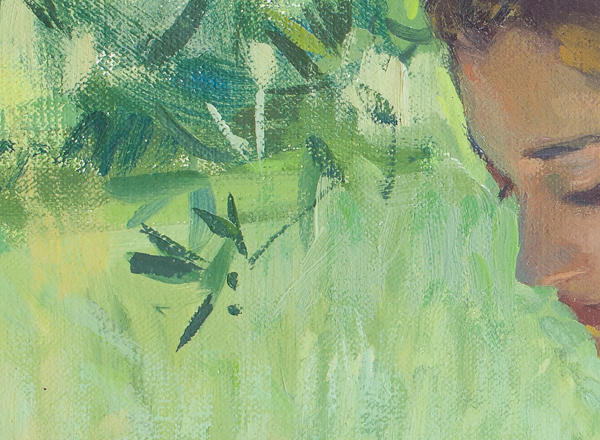
Below are a couple of images of a painting of mine for comparison:
CoCa with a Coloraid IT 8.7 target and Capture One Pro.
Colorchecker Passport with Adobe DNG and Lightroom.
Update for 2021: I have a new (short) post, and a video with my updated thoughts on how to photograph artwork with a DSLR.
This is the previous post: When I wrote about photographing paintings last time, I discussed hiring professionals and the equipment they use. In the years since that post, digital camera technology has developed a great deal and in a direction which works well for photographing paintings.
What an artist needs in a photograph of their work are the correct colors, values, and chroma of the piece, with a distortion-free lens, in a very high resolution which can show the detail in the brushwork, as well as the varying sharpness and softness of the edges. For years the best way to do this was with a medium format camera with a digital back. The price for this equipment could run easily into tens of thousands of dollars. The major recent change in consumer digital photography is that the camera companies have engaged in what technology writers derogatorily refer to as the ‘megapixel war’. This race for better sensors with higher pixel counts has pushed the capabilities of DSLR sensors into the range of the low-end digital backs, potentially saving the DIY painter a ton of money.
Obviously, hiring a professional photographer will achieve better results. They will have better equipment and the experience to know how to use it. They are also incredibly expensive (in Italy I paid €100 per photo, or about €1000 for an hour’s work). You can buy a whole set up for the price, and since photographing paintings is really a one-trick pony, getting it good enough isn’t that difficult.
To photograph artwork well one needs the following equipment: A tripod, proper lighting covered by polarized film, a color calibration system and gray card, a decent DSLR body which can be tethered to a computer, a computer with tethering software, a good macro (micro) lens with a circular polarizing filter, and software to edit and archive the work.
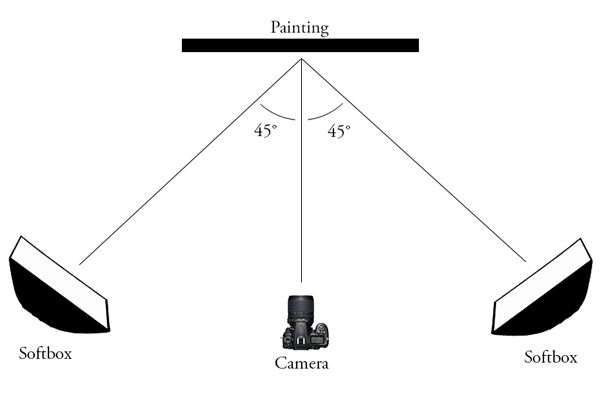
First place the painting on an easel with two bright, full-spectrum, lighting sources at 45 degree angles to the artwork, put the camera on a tripod so the lens is parallel to the surface of the painting, as shown below. Lights, painting and camera should be at the same height. There should be no other light sources, and anything white that can cause a glare on the painting should be covered. Professional studio photographers recommend not using the camera’s auto white balance, so I first set my white balance in the camera to 5400K (which is similar to the color temperature of the light given off by my bulbs). I then made a preset in the camera, photographed a group of paintings over and over, and tweaked the color and contrast settings until my painting looked somewhat correct when the image first comes out of the camera.
My set-up for photographing paintings.
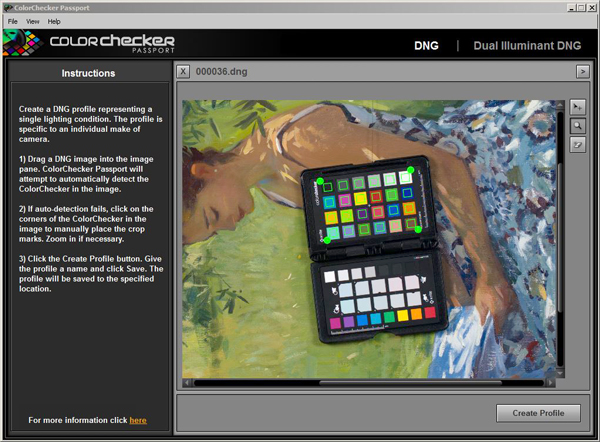
Put your calibration card in front of the painting, photograph it, then run it through the included software (if needed convert RAW to DNG with Adobe’s free DNG converter). The software finds the color squares, measures them and makes a preset for your camera. Save the preset. Remove the calibration card and put a gray card next to the painting.
X-Rite ColorChecker Passport software screen.
Photograph the painting by first putting the camera in mirror-up mode (or set the remote connection to use mirror-up mode). Set ISO to the lowest number, usually 100, and operational mode should be aperture priority or manual (program mode will work too if you can change the aperture setting). Set image type to RAW. Set the lens to manual focus mode. Turn the polarizer on the lens until the glare on the painting is gone.
Next turn on live-view monitoring in the tethering software on your computer, put the tethered image in full-screen mode, zoom in to the maximum and manually focus the shot by hand. If your tethering software can take the photo in mirror-up mode, shoot from the computer screen, otherwise use a shutter-release cable or remote. Do not use the shutter-release button on the camera as it can move slightly and blur the shot. Experiment with various f-stops to find the sharpest for your lens, normally with a macro lens the middle range from f/4 to f/11 will be best.
Import the photo into your editing software and apply the calibration preset (click the eyedropper on the grey card if the white balance is off). Make any other corrections, i.e. rotation, crop, lens profile adjustment, etc… I then tag the paintings with the year, location and subject, so I can find them easily later. I’ve also made export presets for all the possible uses I’ll have for the photos. It makes preparing images trivial.
Some tips for larger paintings: If you don’t have polarizing sheets, the lights can be at angles greater than 45 degrees to reduce glare. If there are problems with getting an even light across a large painting, find an area with even lighting and take multiple photographs, moving the painting on a flat plane at the same distance from the camera until you have photographs of sections of the whole painting. Then use stitching software such as Adobe Photoshop, PTGui or the free Microsoft ICE to put the individual images together. This method can also be used to get ultra-high resolution images of larger paintings while using a low-megapixel camera. With a bit of work you can capture an amount of detail which would give medium format cameras a run for their money. Subtle HDR is another idea if the value range is too great for the camera.