This is another update in my continuing quest to build a lightweight and durable pochade box and mast system in carbon fiber.
I would first like to preface this post with the statement that I am not an expert in working with carbon fiber and, the truth is, I have no idea what I’m doing. When I was a teenager, I tried to make a skimboard out of fiberglass. While my project wasn’t all that successful, I did learn how to work with the resin and fabric composite system which is common to both fiberglass and carbon fiber. My recent foray was guided by that single experience 30 years prior, combined with online research and a few YouTube videos. This should in no way be taken as an expert guide on building painting equipment with carbon fiber, and there are almost certainly much better ways of doing this.
That said, I do now have a few working pochade boxes and a large format plein air easel, so I wanted to show how I did it. And with that in mind, here are all the parts I used for my box:
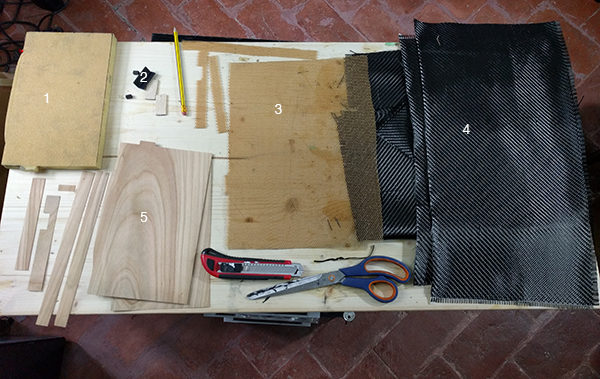
Materials for a DIY carbon fiber pochade box
- Foam mold I cut for the box shape.
- Purchased pre-made carbon fiber reinforcements and wood slats for extra strength at the mast-hook and hinges.
- Nomex honeycomb for rigidity.
- Carbon fiber twill.
- Wood veneer.
- Epoxy resin (not shown).
And the method I used: First I covered my cut foam mold with released film.
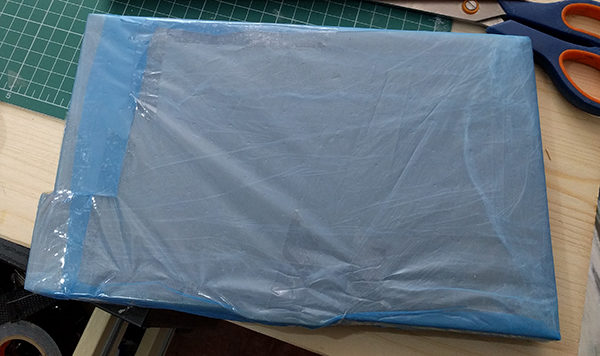
Step 1: Foam mold covered with release film
Then I taped the wood veneer in place.
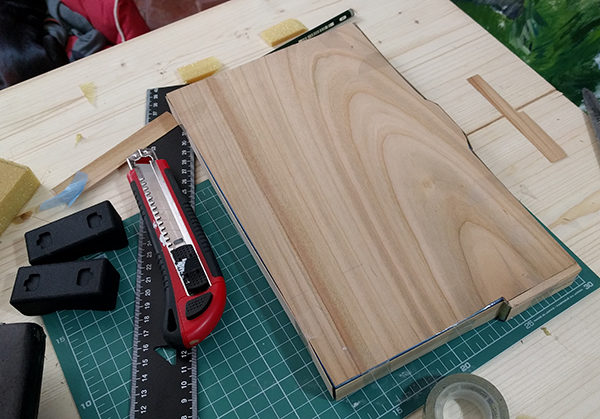
Step 2: Wood veneer taped around mold.
Next I brushed on epoxy and wrapped it with a couple of layers of carbon fiber. I added extra layers of carbon fiber, as well as the pre-made carbon fiber bits and wood slats in sensitive areas, such as where it hooks to the mast and where the hinges would go, respectively. (I didn’t photograph this stage).
Then I wrapped the Nomex honeycomb cardboard around that.
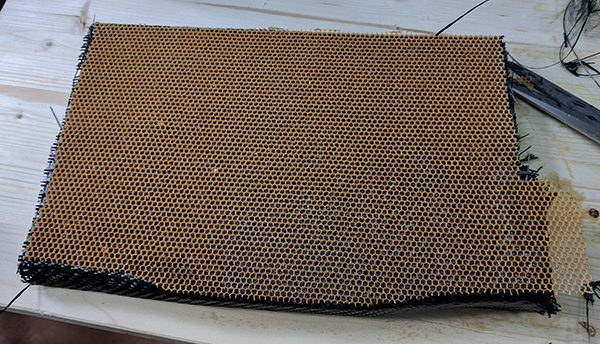
Step 4: Nomex honeycomb wrapped around the first two layers of carbon fiber.
Next I added final layers of carbon fiber (and epoxy), wrapped it with perforated release film and breather cloth, and and stuck it all in a vacuum bag.
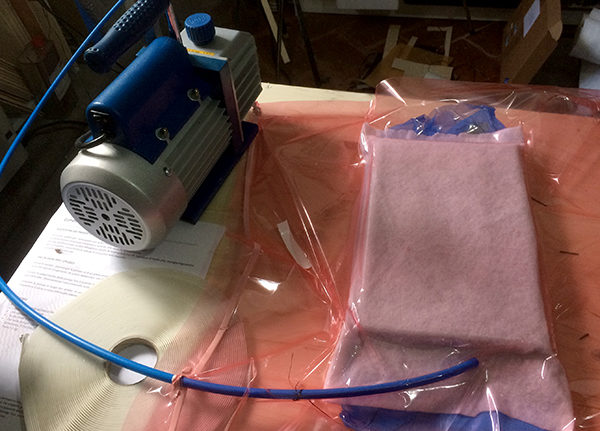
Step 6: The box goes in a vacuum bag for 24 hours.
After the epoxy cured, I cut it the box in half with a Dremel, screwed in the hinges, and added another layer of carbon fiber to cover the hinges (not shown). Finally I cut the box in half again, cut holes for the mast-hook and my thumb, and sanded down everything.
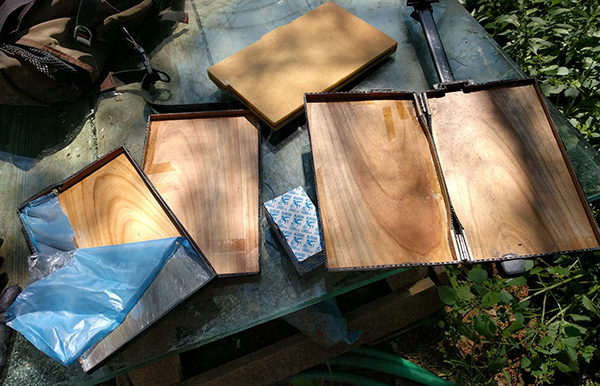
Step 8: The box has just been cut in half with a Dremel, and the mold pulled out.
Cutting and sanding composites such as fiberglass and carbon fiber creates a great deal of dust which is very dangerous to inhale. While working on these projects I wore a bunny suit, respirator, gloves, and protective goggles.
For the mast, I wrapped carbon fiber around a balsa wood slat with an attached Arca Swiss camera plate and put it in a vacuum bag. I folded the extra carbon fiber from one end up over a small foam rectangle (wrapped in release film) to make the hook for the box.
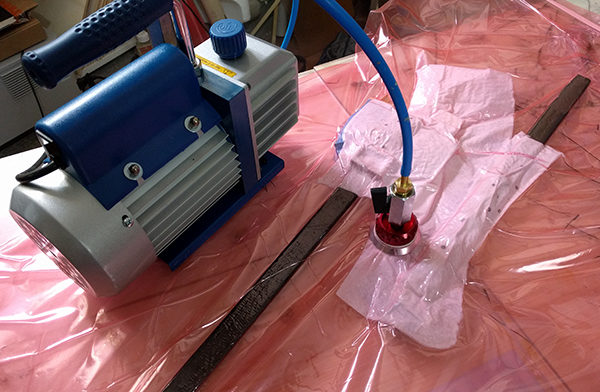
DIY painting mast in a vacuum bag
For the panel holders I first wrapped tin foil around the mast to give some space, then wrapped that with release film, then wrapped carbon fiber again (with a bolt in the middle for the butterfly screw) and stuck it in a vacuum bag.
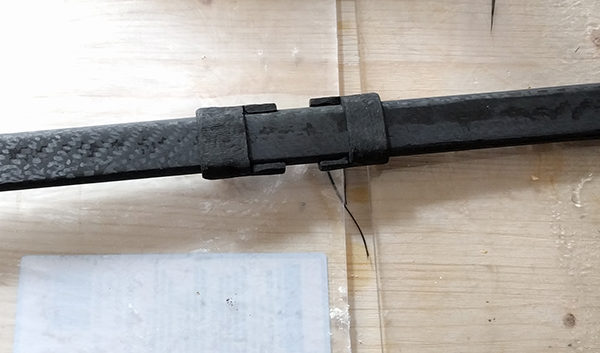
Panel holders tubes on my DIY carbon fiber mast.
Finally, I covered the panel holder tubes with carbon fiber layers and epoxy, and attached it to a mold with the shape I wanted for either panels or canvas or both, and put that into a food-storage vacuum bag. I switched to the food-storage vacuum bags so I could make a few at the same time. It works as well as my regular vacuum pump.
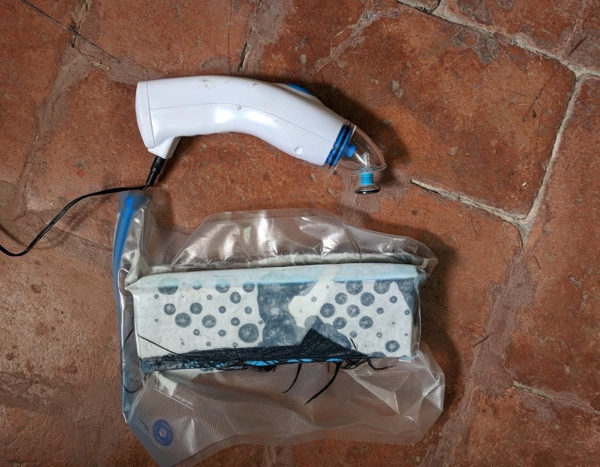
Making smaller carbon fiber mast clips with a food-storage vacuum bag
For the attachment on my Senz umbrella, I similarly wrapped both the cut-down umbrella shaft and the mast in carbon fiber, stuck them both into a vacuum bag, and then sanded everything down.
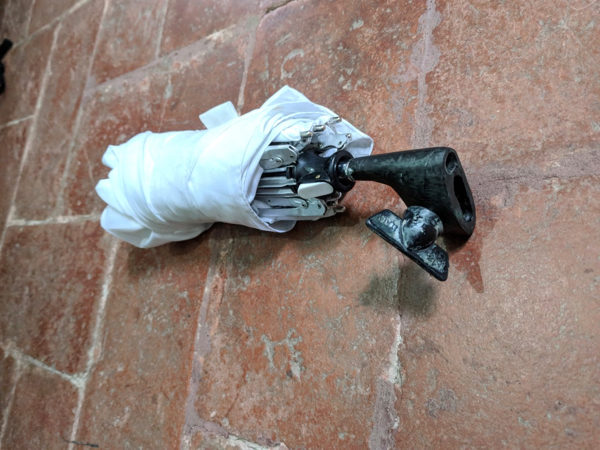
Custom carbon fiber mast attachment for my Senz umbrella.
As I mentioned last time, I’m not convinced this set-up is all that superior to a cigar box attached to an aluminum tripod easel, but I have a working system now so I’ll stick with it. Here are a couple of shots of my set-up in the field:
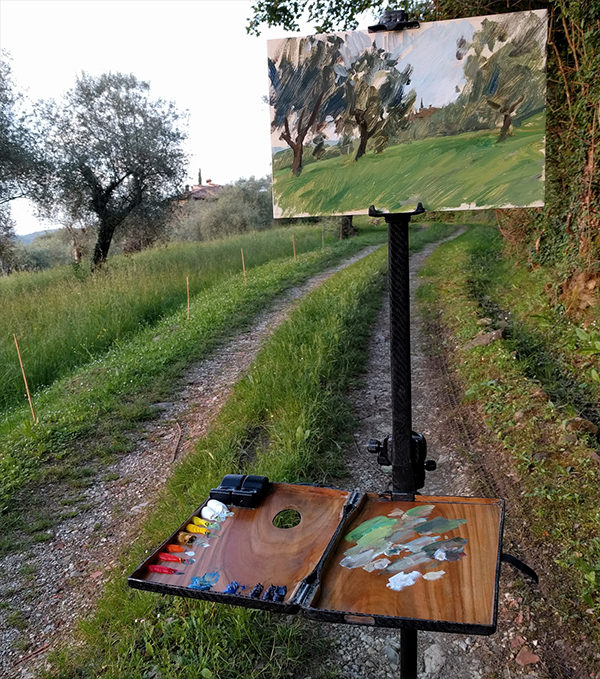
Small carbon fiber pochade set-up in the field.
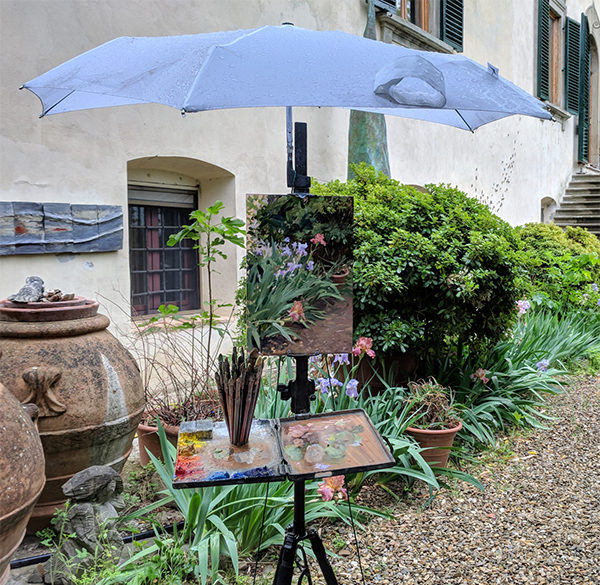
Carbon fiber plein air painting system with a Senz umbrella.
The one area I have had great success with carbon fiber equipment is for larger, relatively lightweight easels. The one I currently use is shown in the photos below. It packs down small enough to fit into my suitcase, but expands to take up to a 47″ (120 cm) vertical stretcher bar. It attaches to a large Gitzo tripod via a heavy-duty ballhead. I also built a larger folding palette that I can both use in the studio, and then carry into the field and hook it to my smaller mast on the Sirui tripod. This way I’m always using the same paints, whether I’m working inside or out.
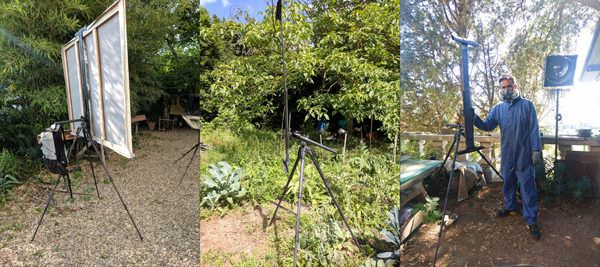
Larger carbon fiber easel design.
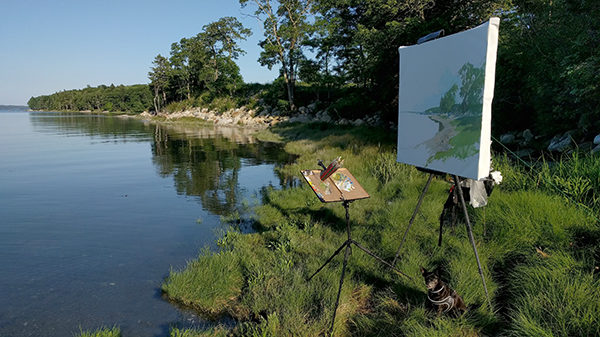
My kit on site in Maine.
To make the larger easel, I cut the shape of the masts in balsa wood, and wrapped them with carbon fiber and Nomex honeycomb. The top and bottom wedges to hold the canvas were wrapped around a mold to get the shape. I did it in three steps to get the parts to fit together.
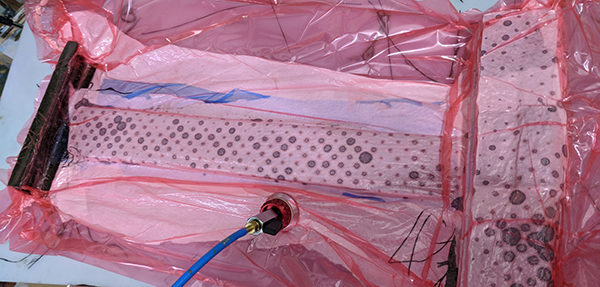
Larger carbon fiber easel in a vacuum bag.
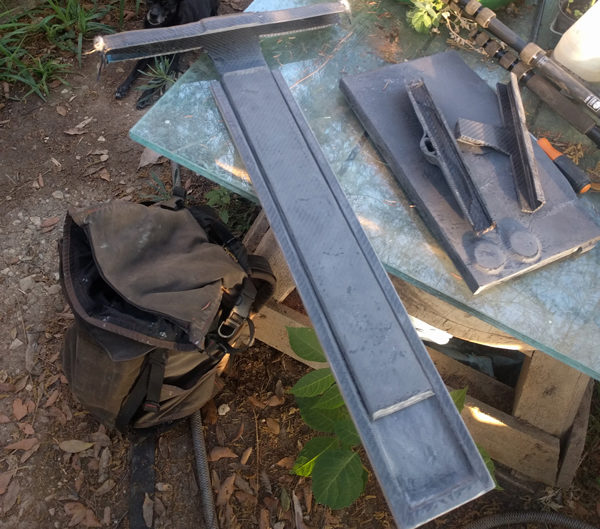
After the second stage of building a large carbon fiber easel.
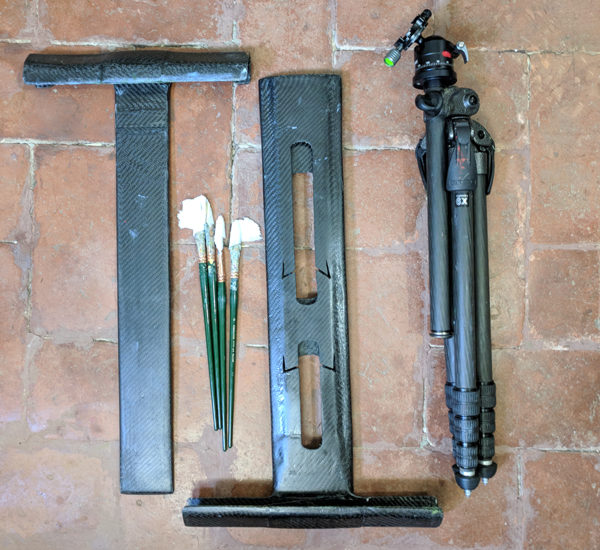
The finished easel. Brushes for scale.
My carbon fiber half of the easel weighs in at around 2.5 lbs (1.2 kg), and I attach it to a very sturdy Gitzo GT2541EX which is 4.1 lbs (1.8kg). I got a tripod with the column that can be set at any angle with the hopes I could avoid buying a ball head, but it hasn’t really worked out. To get enough height in some situations I need the column up pretty high and have to use a ball head to keep the easel perpendicular to the ground.
My next customization will be to attach webbing and a buckle system to both the easel and my backpack, so I can quickly attach and detach it, as well as carry my large canvases on my backpack. The two camera tripods fit into the pockets on my backpack.
Overall, it’s been a lot of work to get this system going. A few people have asked me to go into production with these but, for the moment, it’s too much work for me to produce even one working model. Maybe if I can find a partner to make them, I’ll look into it. In the meantime if anyone wants to use any of my ideas for their own projects, go for it. As I said earlier, you’re not missing out not using a carbon fiber easel, but they are very lightweight and (I think) they look pretty cool.
Awesome. Thanks for sharing this process!
Hey Marc Appreciate the info!
Leonardo would have been proud of you! Amazing is all I can say.
Yes Leo would be proud but where are the wings?
Have you tried the Coulter system?
http://artboxandpanel.com/collections/16679
Yours is probably better
Yes, they look great. A bit heavier and bulkier than my system.
I’ll be the first to buy this system if you start selling. Great work!
Have you thought about using ABS plastic for easel & pallette box instead of wood+carbon fiber+Nomex?