In a recent post I wrote about landscape painting in the Gers region of France. Here are the paintings from the rest of our summer trip. We bounced around quite a bit of the country as we had to be here and there for workshops and to work towards future exhibitions.
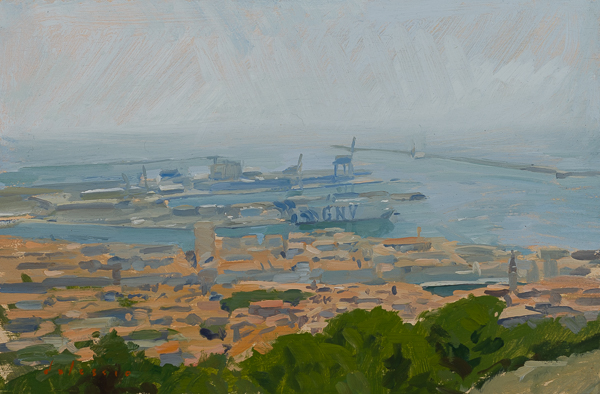
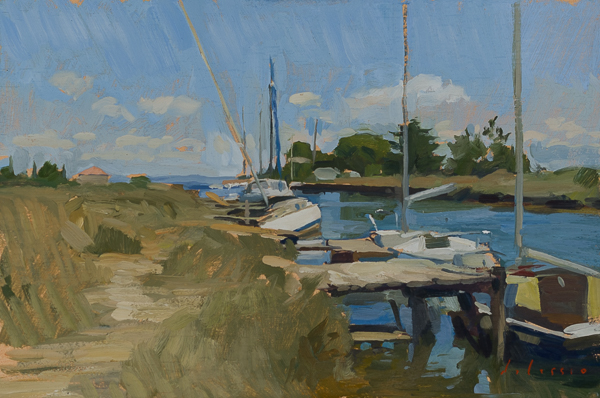
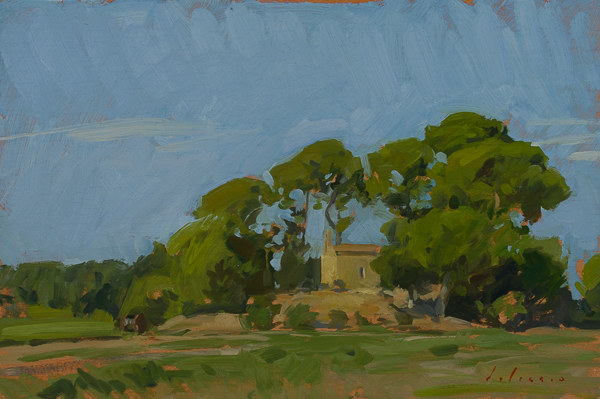
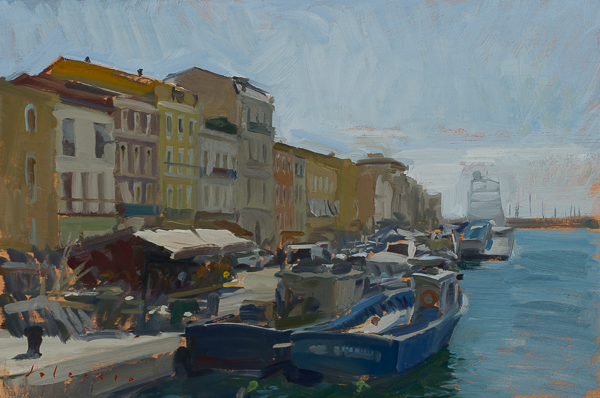
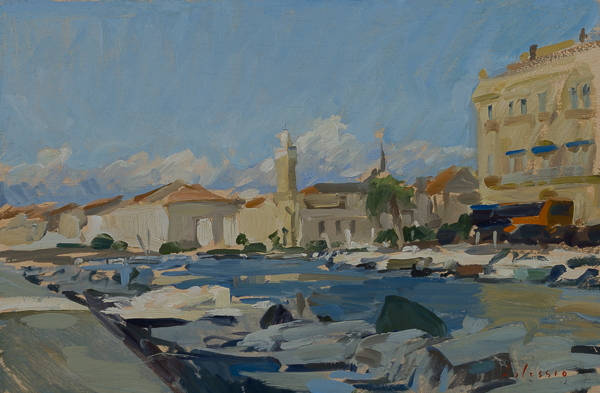
After the Gers, we traveled over to Bordeaux for a few days, then down to the coast between Sète and Agde for a week on the beach.
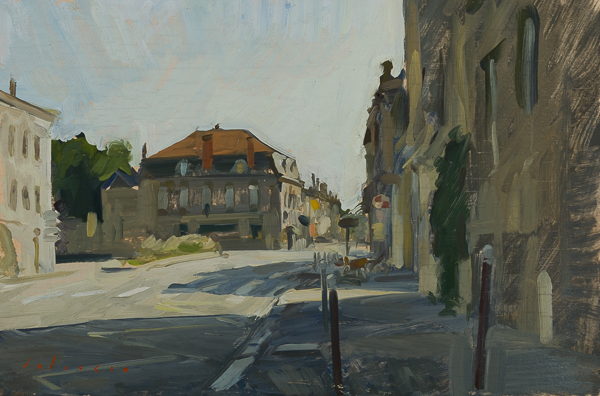
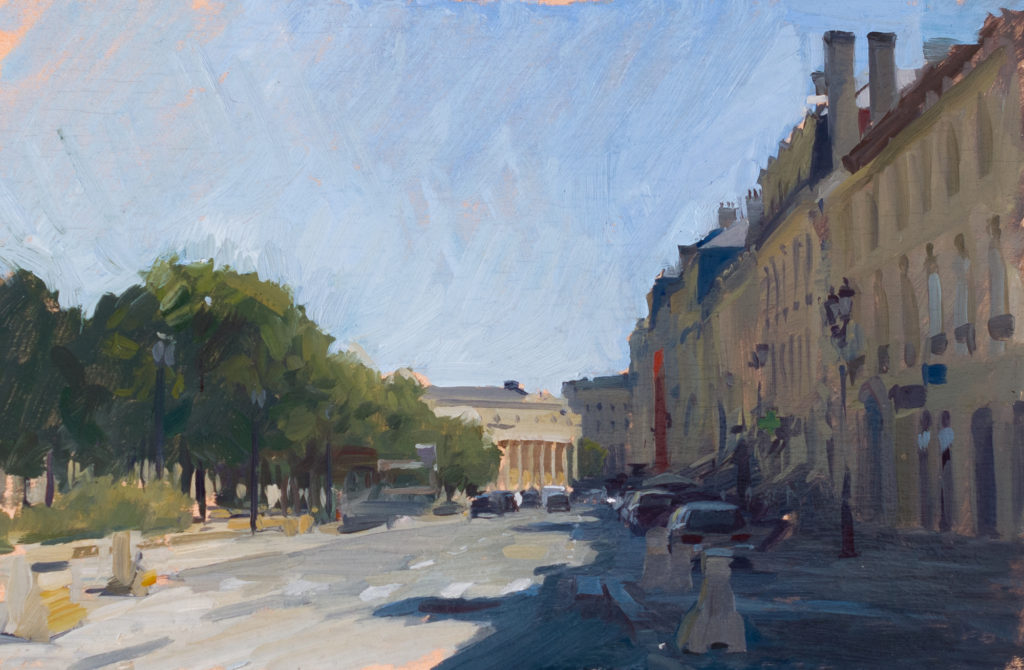
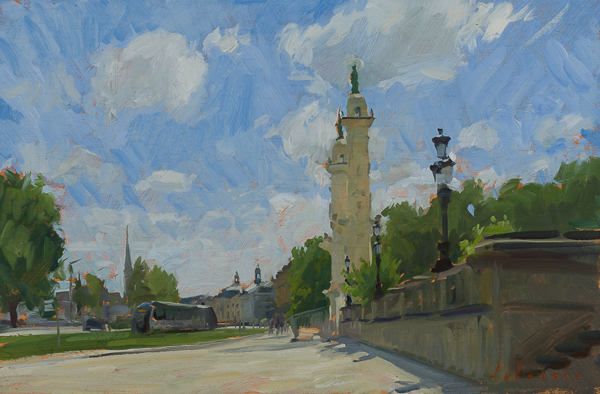
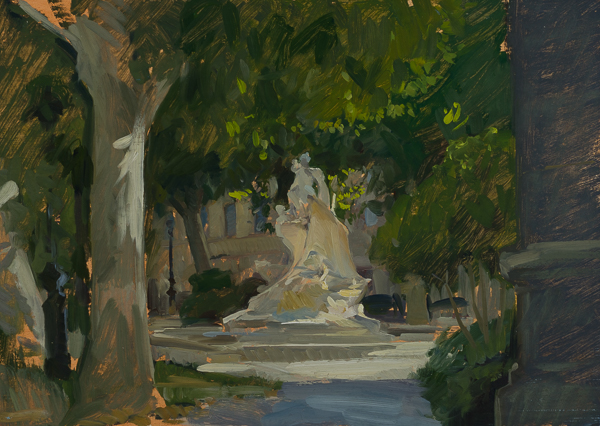
Rue de Pessac, Bordeaux. 20 x 30 cm, oil on panel.Allées de Tourny, Bordeaux. 20 x 30 cm, oil on panel.Place des Quinconces, Bordeaux. 20 x 30 cm, oil on panel.Place Amédée-Larrieu, Bordeaux. 25 x 35 cm, oil on panel.Agde. 20 x 30 cm, oil on panel.Sète. 20 x 30 cm, oil on panel.The Canal du Midi. 20 x 30 cm, oil on panel.Chapel near the Thau. 20 x 30 cm, oil on panel.Les Copains, Sète. 20 x 30 cm, oil on panel.Afternoon light, Sète. 20 x 30 cm, oil on panel.Mèze, on the shore of the Thau. 20 x0 30 cm, oil on panel.
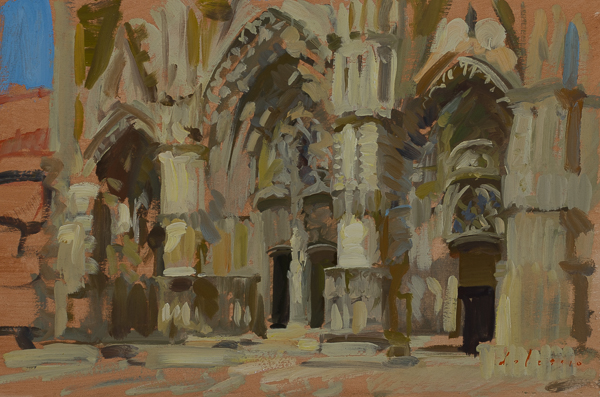
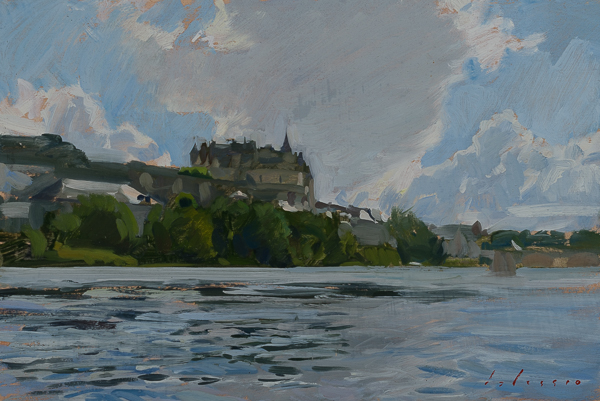
After the Gers, we traveled over to Bordeaux for a few days, then down to the coast between Sète and Agde for a week on the beach. Next we had to head up north for a workshop near Laon, so we stopped for a few days in the Loire Valley.
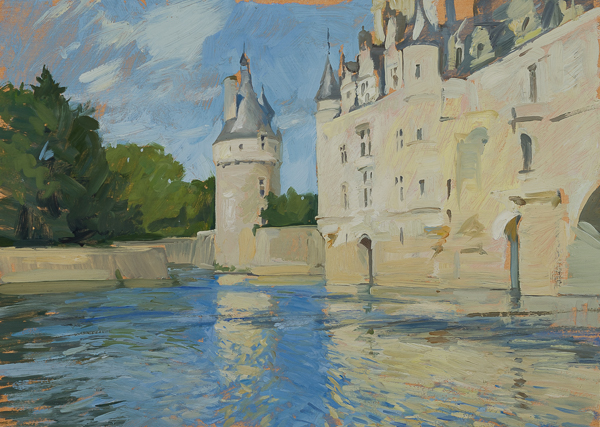
The Cathedral, Tours. 20 x 30 cm, oil on panel.Passing Storm, Amboise. 20 x 30 cm, oil on panel.Château de Chenonceau. 25 x 35 cm, oil on panel.Blois. 20 x 30 cm, oil on panel.
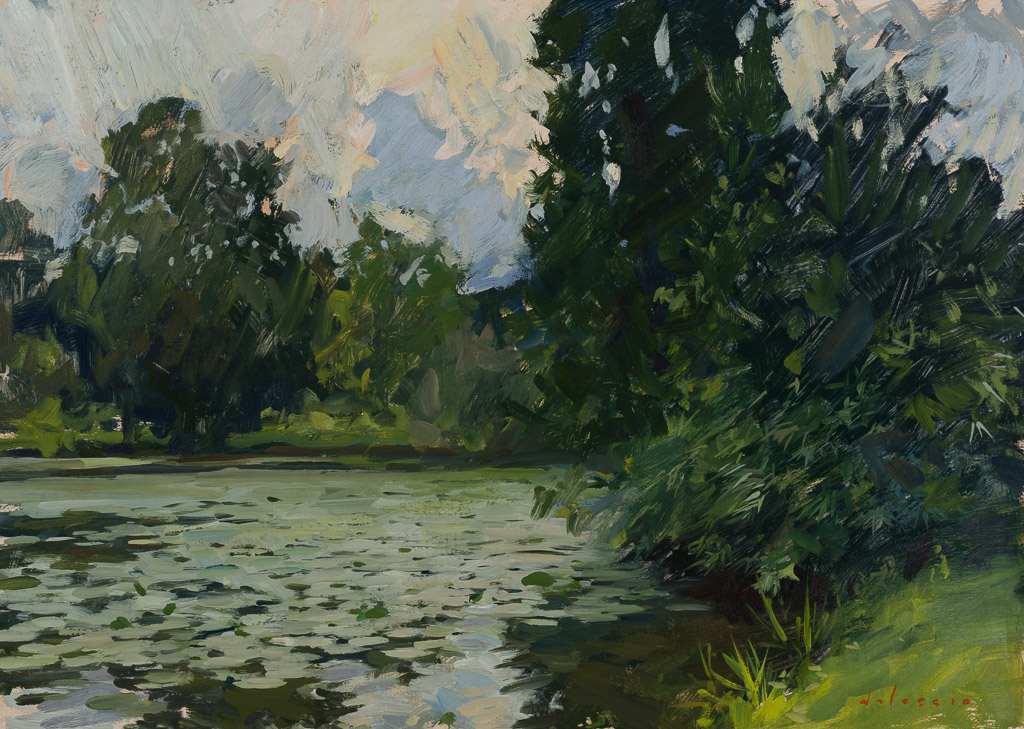
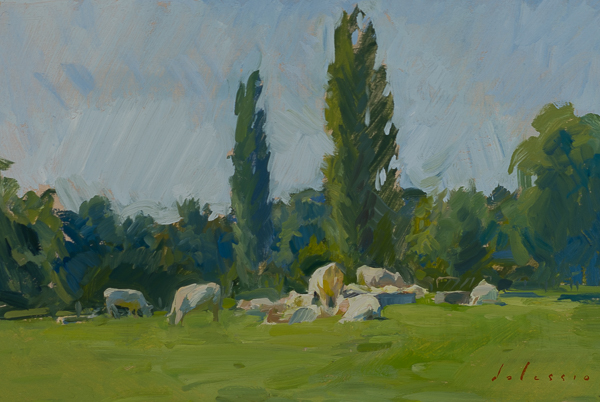
In Laon we had a workshop, so I didn’t get much of my own work done. We were on a beautiful property though, so I tried to paint as often as I could.
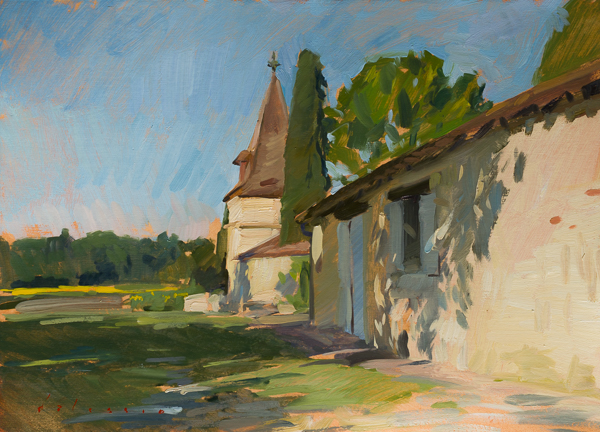
The Side of a Pond, Fourdrain. 25 x 35 cm, oil on panel.Cows in the Sun, Fourdrain. 20 x 30 cm, oil on panel.The Farm Buildings, Fourdrain. 20 x 30 cm, oil on panel.
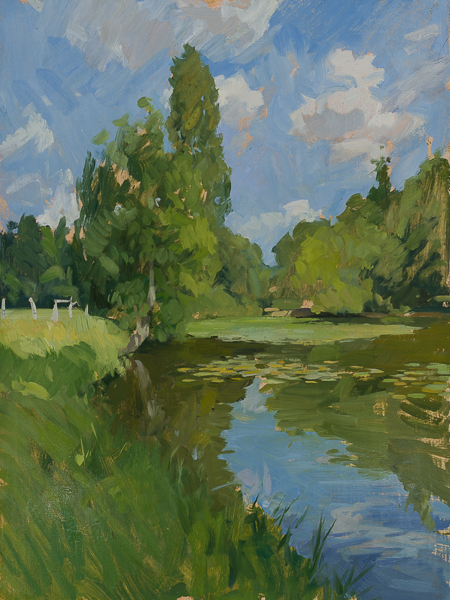
Lily Pond. 35 x 25 cm, oil on panel.
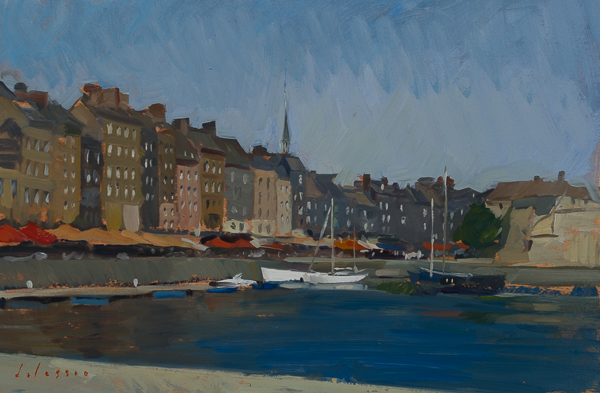
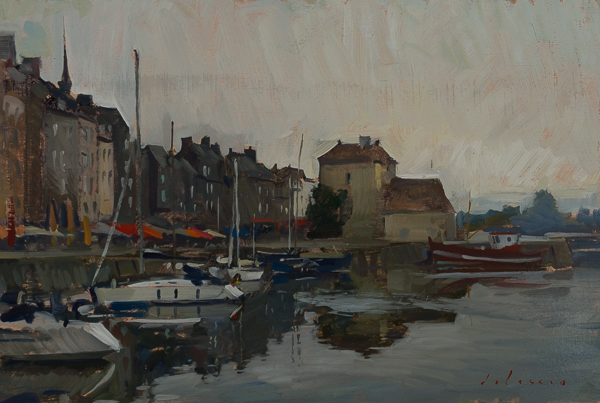
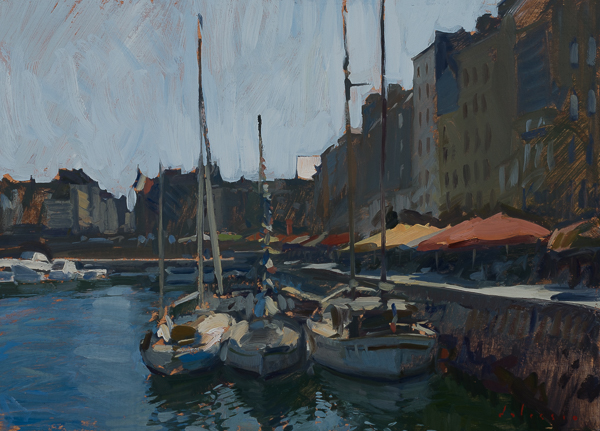
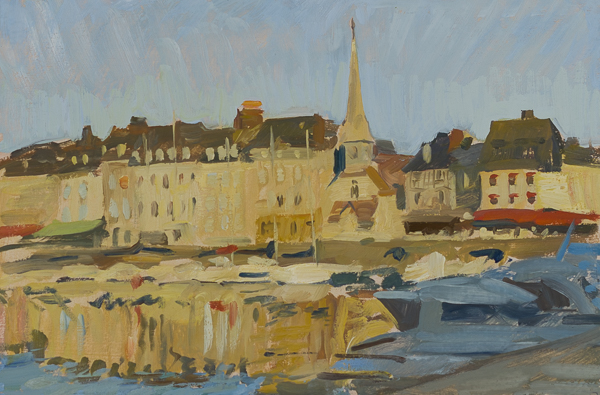
After Laon we had a couple of days to kill so we headed over to Normandy to paint in Honfleur. I’m always trying to find places where my favorite artists worked, and Boudin, Seago, Jongkind and Monet (among others) all painted in and around the small port there.
Honfleur. 20 x 30 cm, oil on panel.Morning, Honfleur. 20 x 30 cm, oil on panel.Boats, Midday, Honfleur. 25 x 35 cm, oil on panel.Evening Light, Honfleur. 20 x 30 cm, oil on panel.
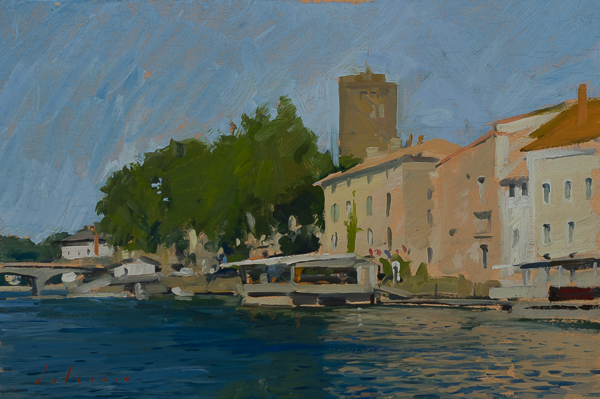
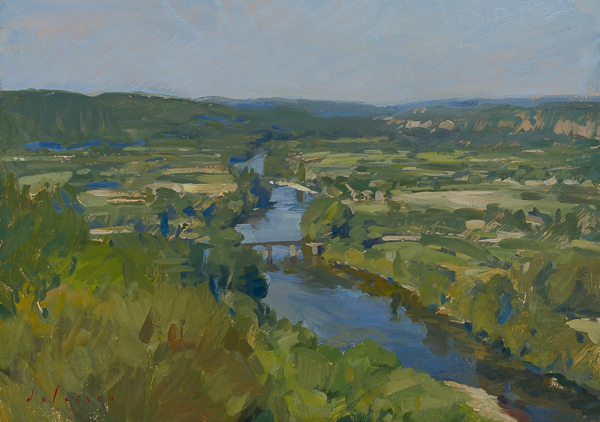
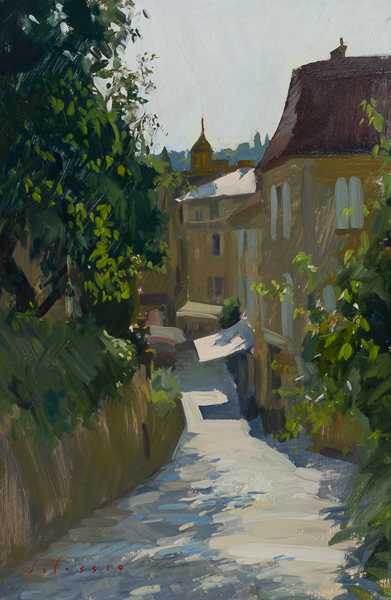
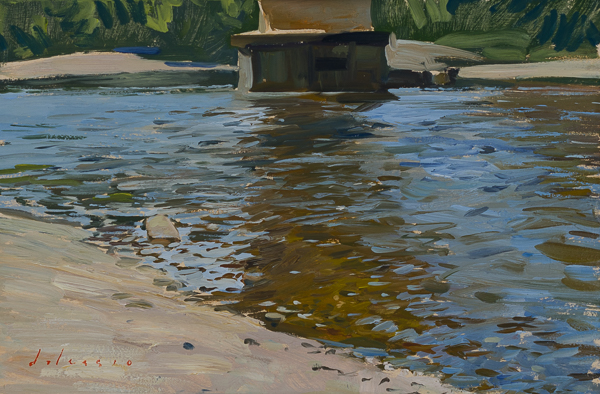
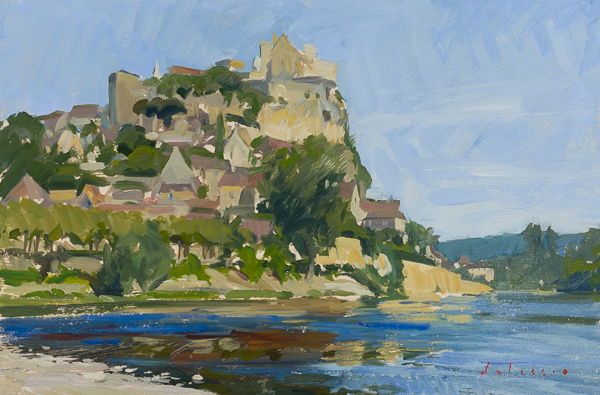
From Normandy we drove back down to the Dordogne, to paint local scenes for the V&A gallery in Sarlat-la-Canéda.
The Dordogne from Domme. 25 x 35 cm, oil on panel.
Sarlat-la-Canéda. 30 x 20 cm, oil on panel.
Water Study, the Dordogne. 20 x 30 cm, oil on panel.Beynac from the Dordogne. 20 x 30 cm, oil on panel.
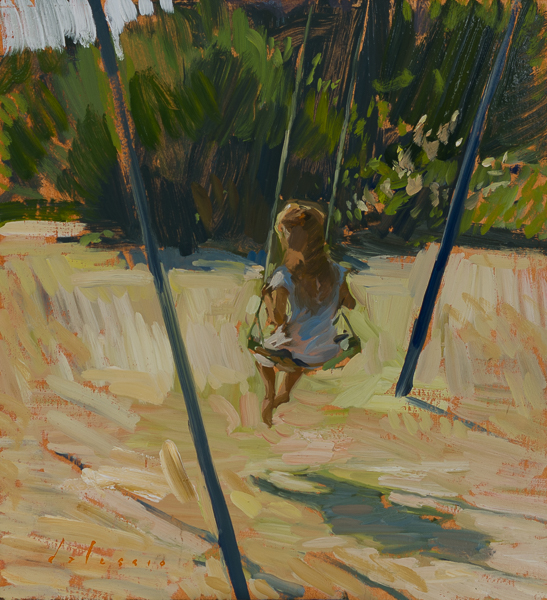
Child on a Swing. 25 x 22 cm, oil on panel.
These are most of the paintings but the full summer’s oeuvre was posted at the time to my Instagram account.
Overall it was a great trip. The painting locations across France are varied and stunning, the food was amazing, and the people were wonderful and welcoming. We’ll be back again in the summer of 2020 as we have an exhibition and a couple of workshops.
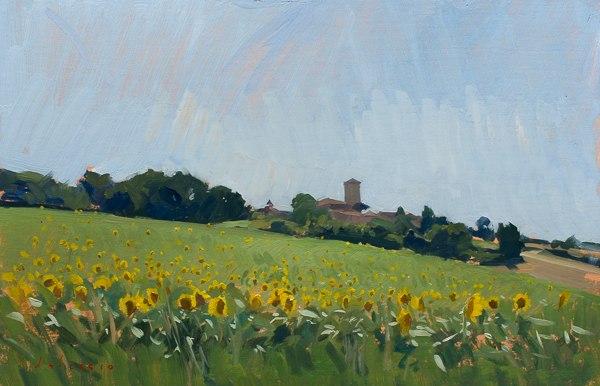
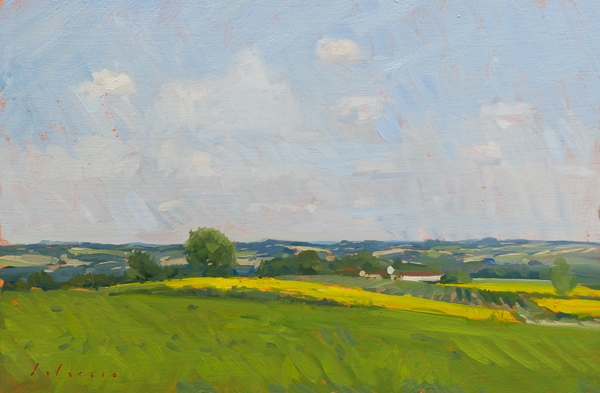
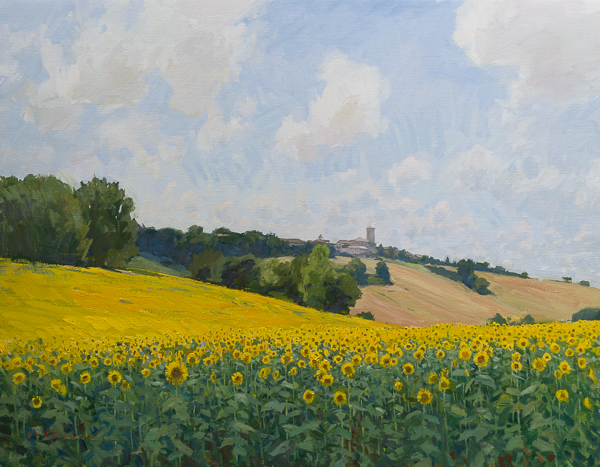
Sunflower Field below Plieux. 20 x 30 cm, oil on panel.
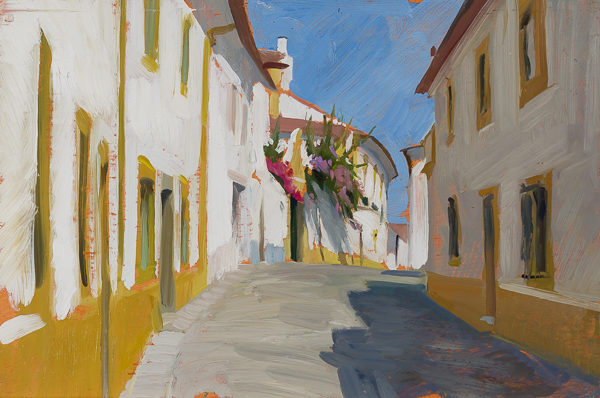
I’ve just returned from a number of weeks painting landscapes across France. The other paintings will be posted in the coming weeks, but I wanted to single out the work from the Gers region as it’s not an area that I’ve ever heard mentioned for landscape painting. Which is a shame, because it’s pretty great.
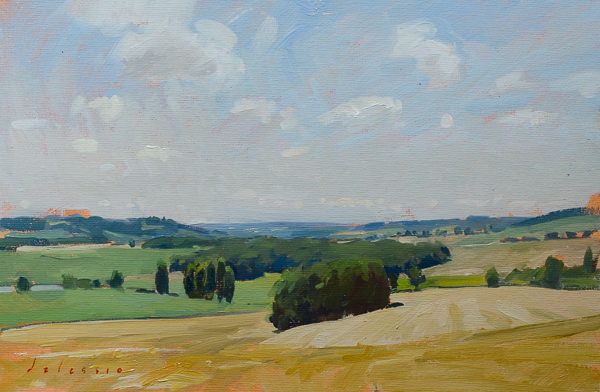
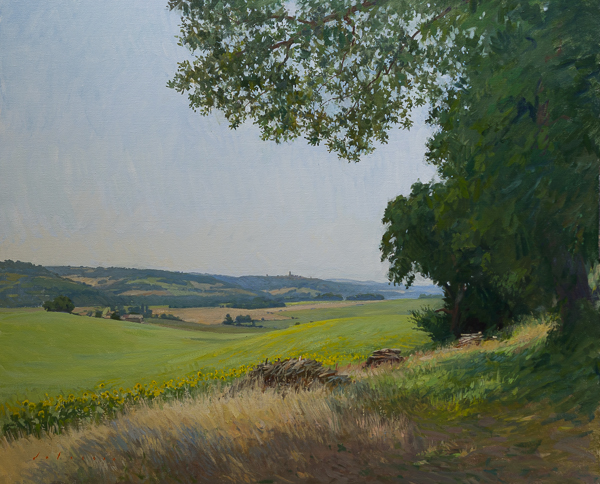
Rolling Hills of the Gers. 20 x 30 cm, oil on panel.
We were hosted by the Plieux Art Association, which organizes workshops and exhibitions in the small village of Plieux, about 15 minutes from the town of Lectoure. The workshops are terrific as the location is beautiful and the hostess is an amazing cook. The students stay in various lodgings in the village. On this course, everyone was French and I had to teach in French.
The Village of Plieux. 20 x 30 cm, oil on panel.
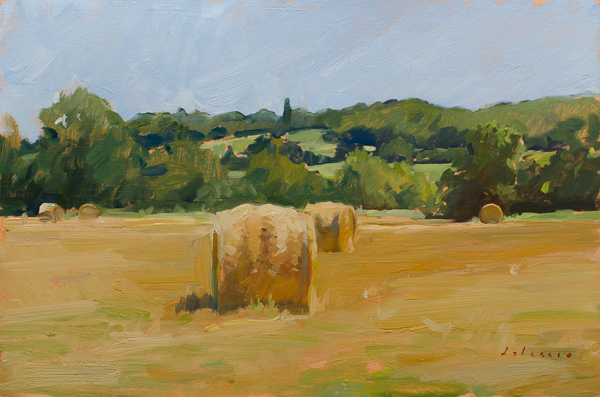
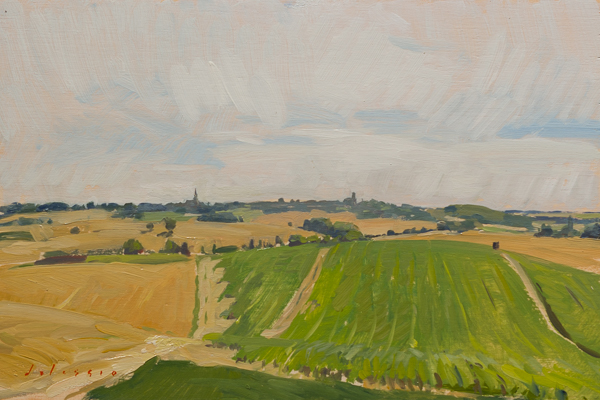
The area around Lectoure is one of the best I’ve seen for plein air painting. It’s all rolling hills, with a choice of valley and hill size, so the artists can pick longer or shorter views. It’s mostly smaller farming, so it’s not one endless field, but many smaller ones with varying crops. There isn’t much livestock, so no fences to keep artists out. A lot of the fields are either wheat or sunflowers, two very popular subjects with artists. Unfortunately we missed wheat season, as the harvest is in June.
Hay Bales, the Gers. 20 x 30 cm, oil on panel.
All of France has great trees for landscape painting. They clearly get enough water, and haven’t cut the larger ones down. The Gers is no exception.
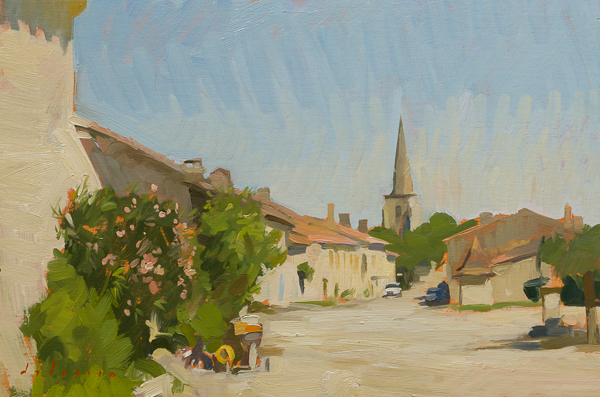
The towns as well are really picturesque. Not overly pretty, but not marred by too much new construction. They also don’t get the crazy tourism you see elsewhere in Europe these days, so it’s mostly locals, and you don’t have to pay for parking.
Market Day, Lectoure. 25 x 35 cm, oil on panel.
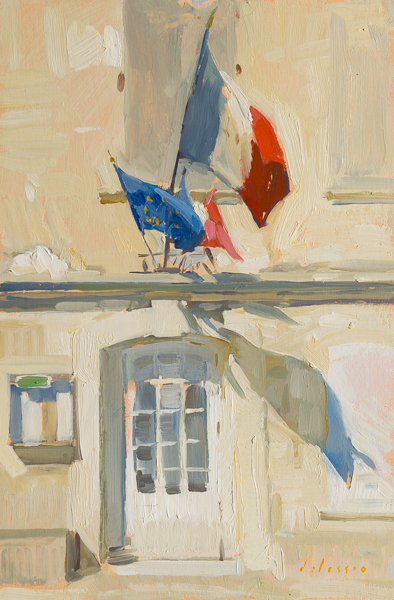
Bastille Day Flags on the City Hall, Plieux. 30 x 20 cm, oil on panel.
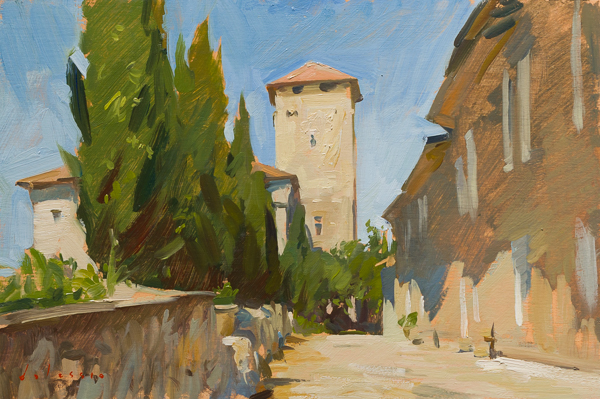
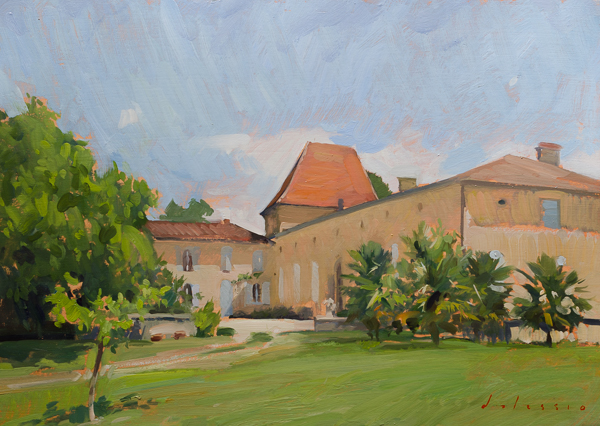
The Castle, Plieux. 20 x 30 cm, oil on panel.Chateau de Pellehaut. 25 x 35 cm, oil on panel.
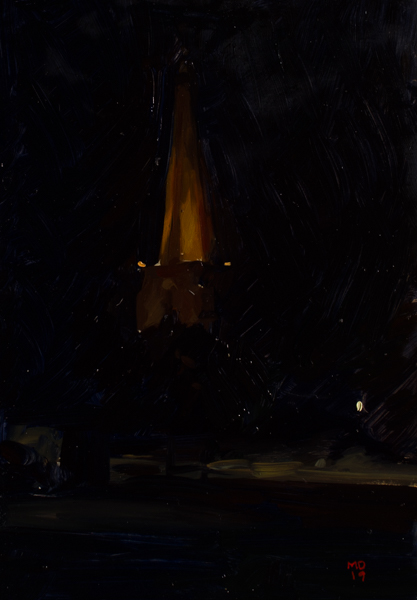
Plieux Nocturne. 25 x 20 cm, oil on panel.
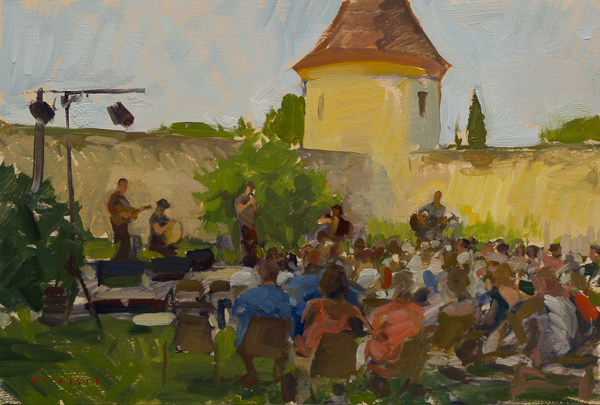
Plieux. 20 x 30 cm, oil on panel.Vineyard and Sunflowers, Chiroulet. 20 x 30 cm, oil on panel.Pigeonnier, Plieux. 25 x 35 cm, oil on panel.Concert. 20 x 30 cm, oil on panel.
I also did a few larger plein air landscapes:
Hay Bales, the Gers. 70 x 90 cm, oil on linen.Sunflower Field, Plieux. 70 x 90 cm, oil on linen.Wood Stacks. 90 x 110 cm, oil on linen.
All of these paintings are for an exhibition next July at the Plieux Art Association. I hope to see you there.
Update: For higher resolution images, please see my Flickr Album.
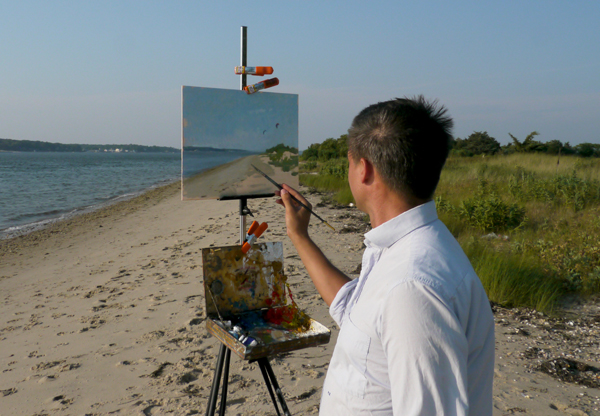
The first time I saw a plein air painting incorporated into the surrounding landscape in that way was many years ago when someone took a photo of a painting I was working on outside (above). This person lined up some of the major lines in the painting with the lines in nature behind the panel and thought it was very clever. At the time I was mildly annoyed with the image as I thought it would confuse people into thinking that it somehow related to sight-size.
As it turned out, I was right.
A few years later when we all started carrying decent quality cameras around in our telephones, I started regularly posting my paintings to social media directly from the field. Usually I took a photo of my painting with the actual scene on one side, so students who follow me could see my decisions by comparing the two. On a few occasions though, something would happen where my view would be obscured when I was finished and I would take the photo with the painting covering the scene. I would also align some of the lines so that the painting and the background appeared to merge.
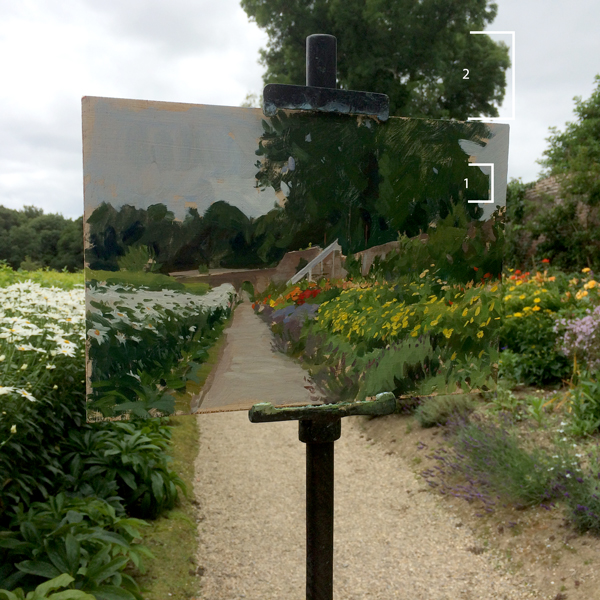
One example of this is the painting below, where a tour group arrived and parked themselves in the path just behind my panel. As it was lunchtime, and I didn’t want to wait for them to leave, I used the painting to block them from the view.
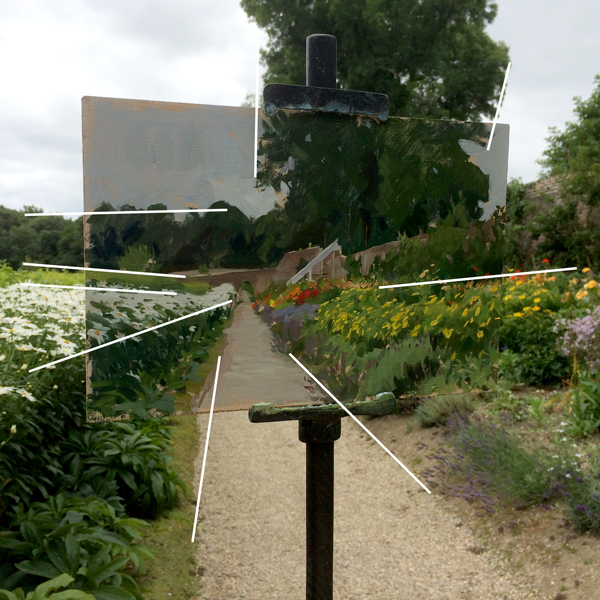
This has nothing to do with sight-size though. In the photo above, you can see how the painted bulge of the tree (1) is completely different in size from the actual shape in nature (2). This is because, in order to get the lines to line up, I’ve had to pull the camera back away from the painting. When I did the painting my viewpoint would have been closer, and the two shapes would have been the same size. (See my sight-size video on YouTube for further clarification).
All I’ve really done is moved the camera until some of the major lines in my painting align with the same lines in the actual scene. I even had to tilt the camera away from the panel a bit to get it to work.
This has been a bit long-winded, but I just wanted to say that these aligned photos have nothing to do with sight-size. Any artist working outside can do them, with any technique or medium. Having compressed, naturalistic values will help with the illusion, but I’ve seen some wonderful examples of very stylized work doing the same trick. Just move the camera until a few important shapes line up with the view behind.
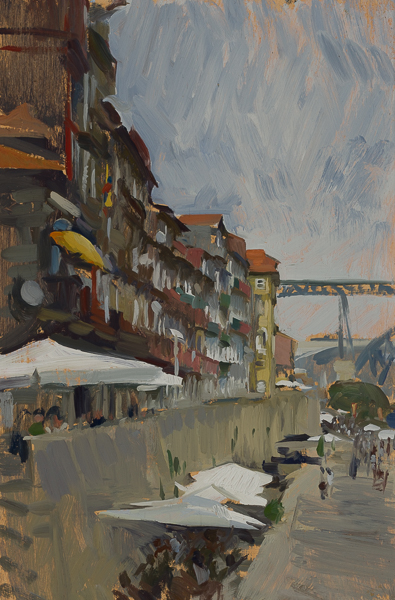
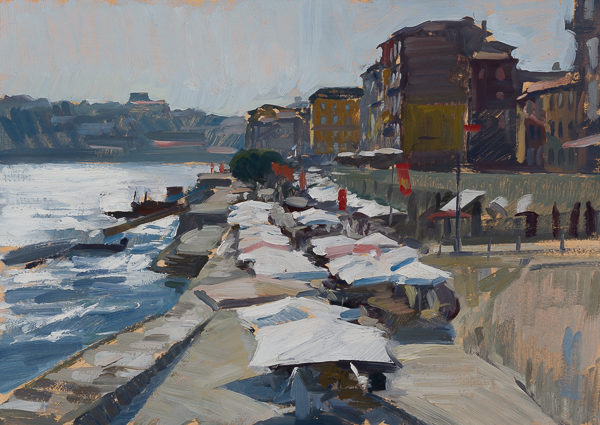
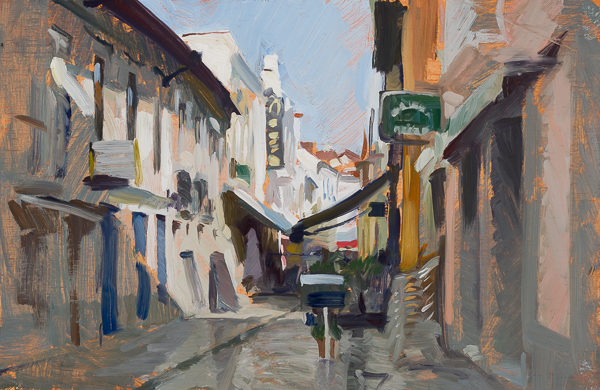
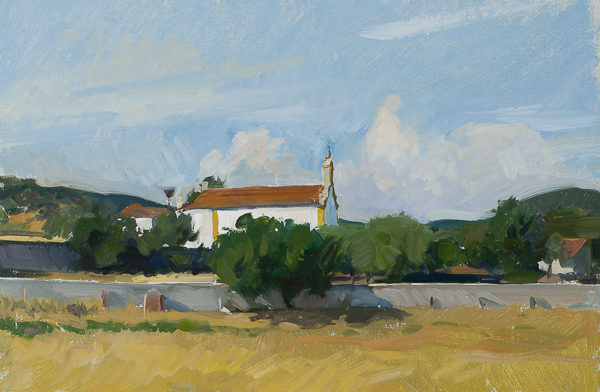
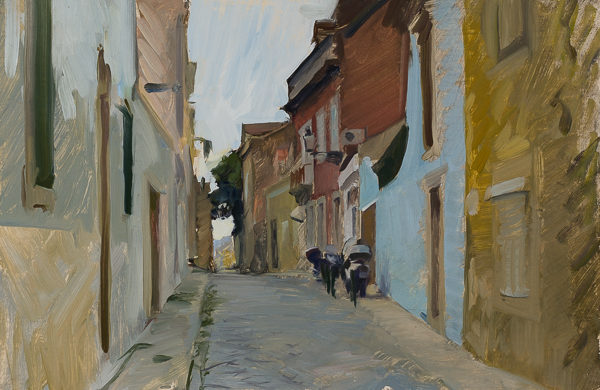
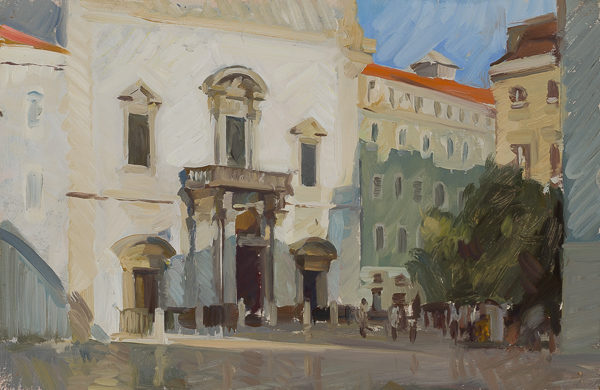
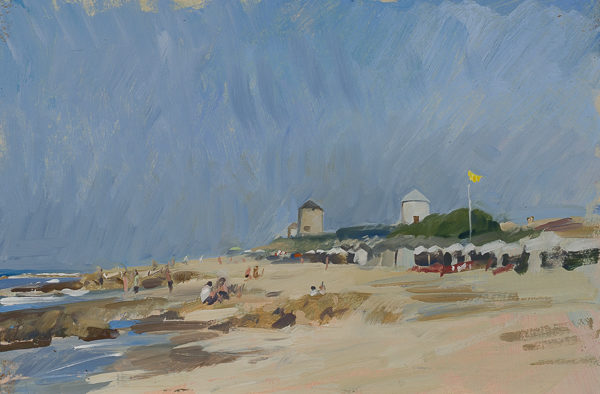
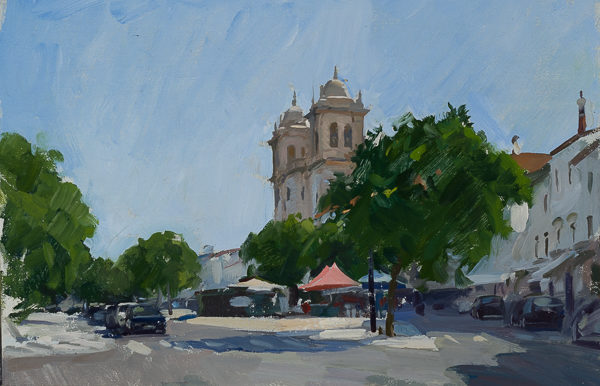
We spent our September this year plein air painting in Portugal. It was the first time I had visited the country and we started from the north near Apulia, and worked our way south to the Algarve. We had great weather, with the exception of some fog on the coast. The food was terrific (and inexpensive) and the people were all really friendly.
Outside of the cities, Portugal and California look very similar. From the ubiquitous eucalyptus trees, to the cliffs looking down on an ocean teaming with surfers, to the rolling hills with golden grass and cork trees (which look like California live oaks), to the traditional whitewashed architecture which is similar to the Spanish colonial buildings, there were many times when I did a double-take to remember where I was. The light, like in California, is especially beautiful.
Villas in Sintra. 25 x 35 cm, oil on panel.
Bougainvillea, Évora. 20 x 30 cm, oil on panel.
Porto, the Waterfront. 30 x 20 cm, oil on panel.
Market Stalls, Porto. 25 x 35 cm, oil on panel.
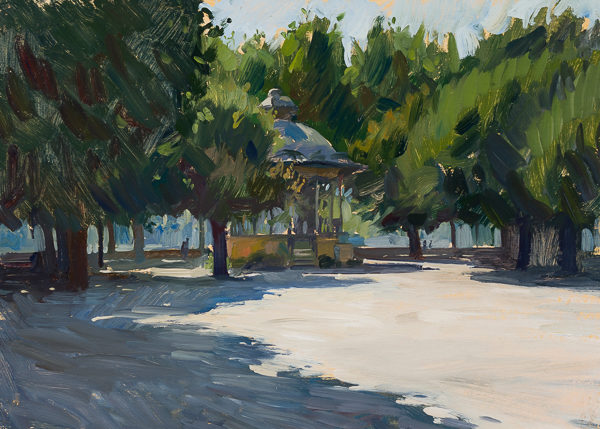
Pavilion in a Park, Coimbra. 25 x 35 cm, oil on panel.
Street in Aveiro. 20 x 30 cm, oil on panel.
Igreja de São Brissos, Alentejo, 20 x 30 cm, oil on panel.
Street in Lisbon. 20 x 30 cm, oil on panel.
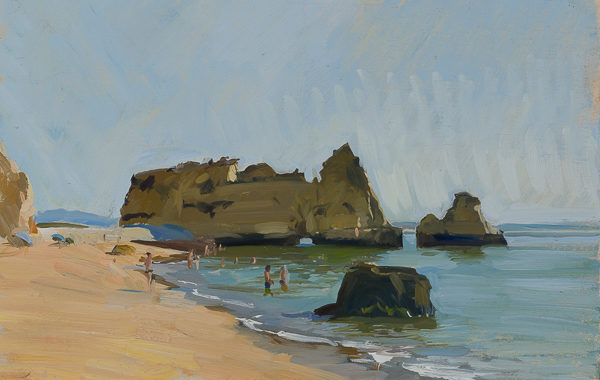
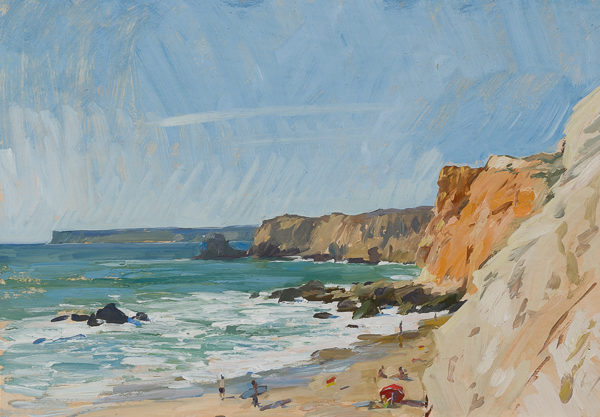
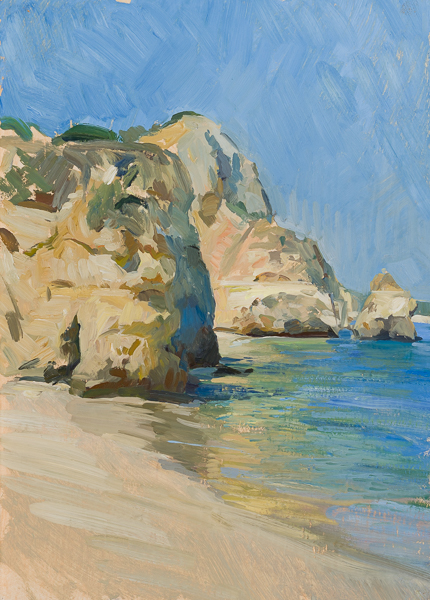
The light in the Algarve is stunning. Since the coast faces south, the sun is above the water most of the day. The area is more built-up than other coastal areas that we visited, but there were a lot of wonderful views.
Praia de Dona Ana #1. 25 x 35 cm, oil on panel.
Praia de Dona Ana #2. 20 x 30 cm, oil on panel.
Praia do Tonel, Sagres. 25 x 35 cm, oil on panel.
Evening Light, Algarve. 20 x 30 cm, oil on panel.
Praia do Camilo. 35 x 25 cm, oil on panel.
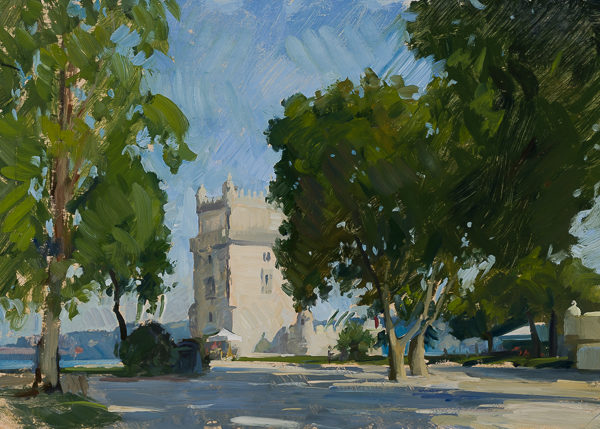
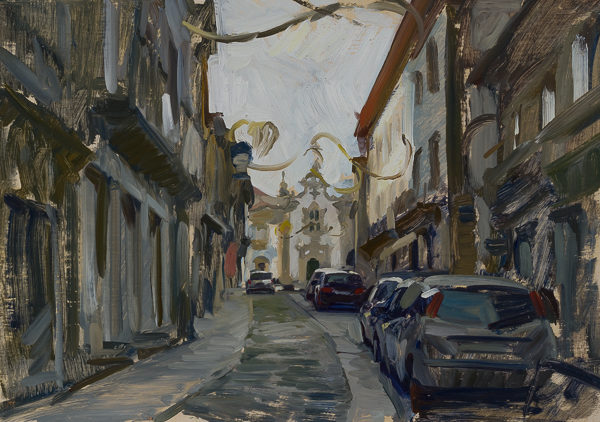
As pretty as Lisbon and Porto are, we didn’t spend a lot of time in the bigger cities as we were traveling with a dog and the smaller towns and countryside were more manageable.
Sycamores at the Belém Tower, Lisbon. 25 x 35 cm, oil on panel.
Igreja de São Domingos, Evening Light (Lisbon). 20 x 30 cm, oil on panel.
Windmills on the Beach, Apulia. 20 x 30 cm, oil on panel.
Street in Viana do Castelo. 25 x 35 cm, oil on panel.
Rossio Marques de Pombal, Estremoz. 20 x 30 cm, oil on panel.
This is another update in my continuing quest to build a lightweight and durable pochade box and mast system in carbon fiber.
I would first like to preface this post with the statement that I am not an expert in working with carbon fiber and, the truth is, I have no idea what I’m doing. When I was a teenager, I tried to make a skimboard out of fiberglass. While my project wasn’t all that successful, I did learn how to work with the resin and fabric composite system which is common to both fiberglass and carbon fiber. My recent foray was guided by that single experience 30 years prior, combined with online research and a few YouTube videos. This should in no way be taken as an expert guide on building painting equipment with carbon fiber, and there are almost certainly much better ways of doing this.
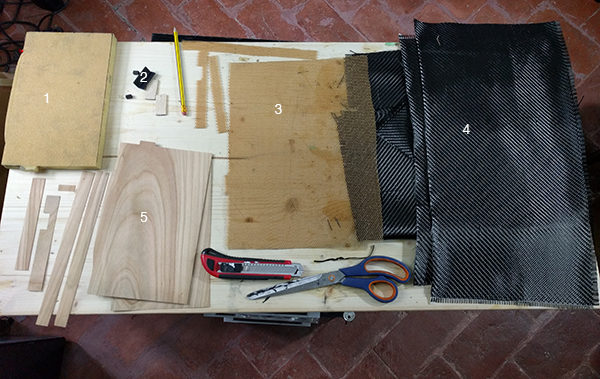
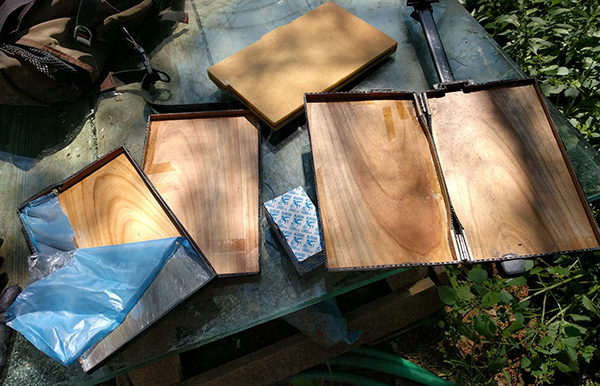
That said, I do now have a few working pochade boxes and a large format plein air easel, so I wanted to show how I did it. And with that in mind, here are all the parts I used for my box:
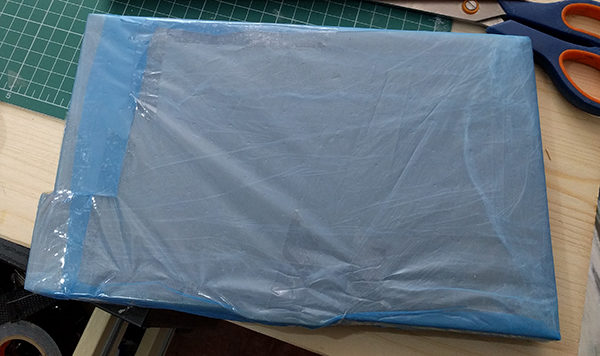
Materials for a DIY carbon fiber pochade box
Foam mold I cut for the box shape.
Purchased pre-made carbon fiber reinforcements and wood slats for extra strength at the mast-hook and hinges.
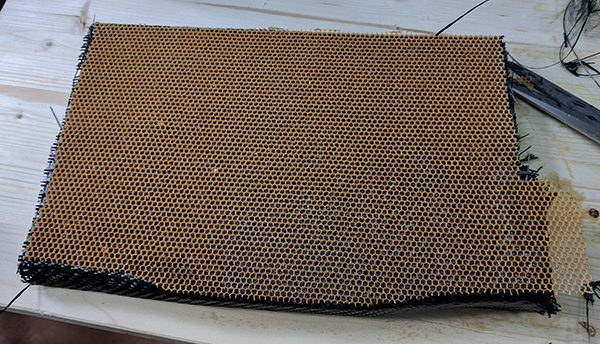
Nomex honeycomb for rigidity.
Carbon fiber twill.
Wood veneer.
Epoxy resin (not shown).
And the method I used: First I covered my cut foam mold with released film.
Step 1: Foam mold covered with release film
Then I taped the wood veneer in place.
Step 2: Wood veneer taped around mold.
Next I brushed on epoxy and wrapped it with a couple of layers of carbon fiber. I added extra layers of carbon fiber, as well as the pre-made carbon fiber bits and wood slats in sensitive areas, such as where it hooks to the mast and where the hinges would go, respectively. (I didn’t photograph this stage).
Then I wrapped the Nomex honeycomb cardboard around that.
Step 4: Nomex honeycomb wrapped around the first two layers of carbon fiber.
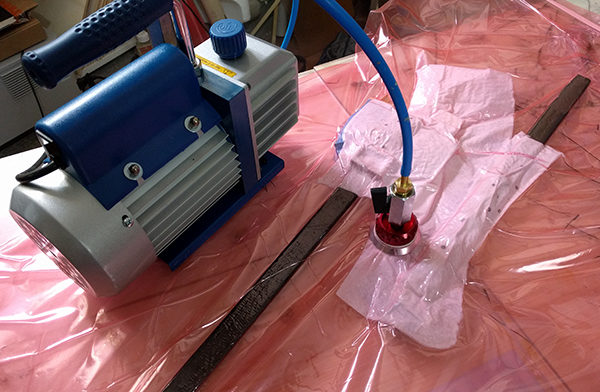
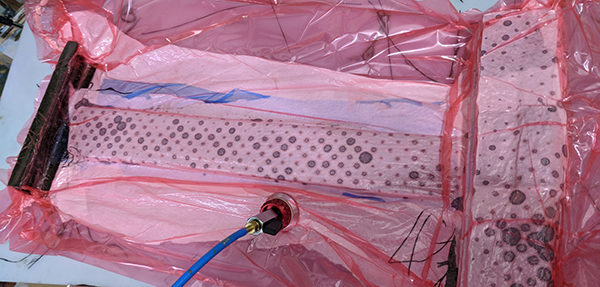
Next I added final layers of carbon fiber (and epoxy), wrapped it with perforated release film and breather cloth, and and stuck it all in a vacuum bag.
Step 6: The box goes in a vacuum bag for 24 hours.
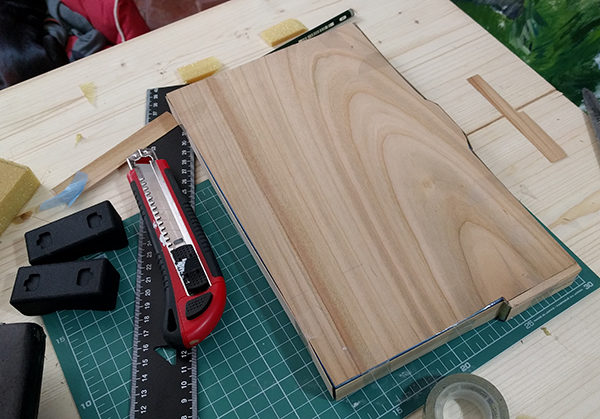
After the epoxy cured, I cut it the box in half with a Dremel, screwed in the hinges, and added another layer of carbon fiber to cover the hinges (not shown). Finally I cut the box in half again, cut holes for the mast-hook and my thumb, and sanded down everything.
Step 8: The box has just been cut in half with a Dremel, and the mold pulled out.
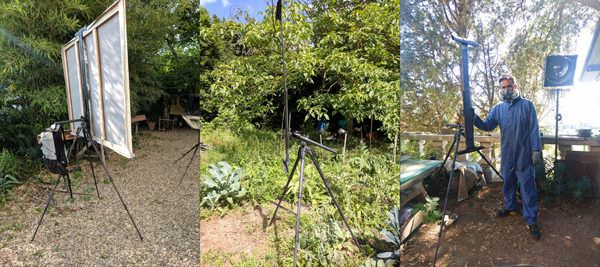
Cutting and sanding composites such as fiberglass and carbon fiber creates a great deal of dust which is very dangerous to inhale. While working on these projects I wore a bunny suit, respirator, gloves, and protective goggles.
For the mast, I wrapped carbon fiber around a balsa wood slat with an attached Arca Swiss camera plate and put it in a vacuum bag. I folded the extra carbon fiber from one end up over a small foam rectangle (wrapped in release film) to make the hook for the box.
DIY painting mast in a vacuum bag
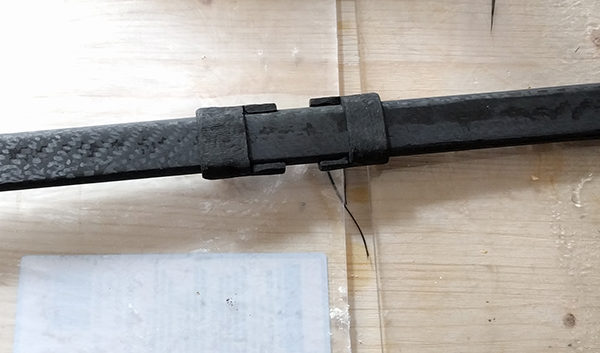
For the panel holders I first wrapped tin foil around the mast to give some space, then wrapped that with release film, then wrapped carbon fiber again (with a bolt in the middle for the butterfly screw) and stuck it in a vacuum bag.
Panel holders tubes on my DIY carbon fiber mast.
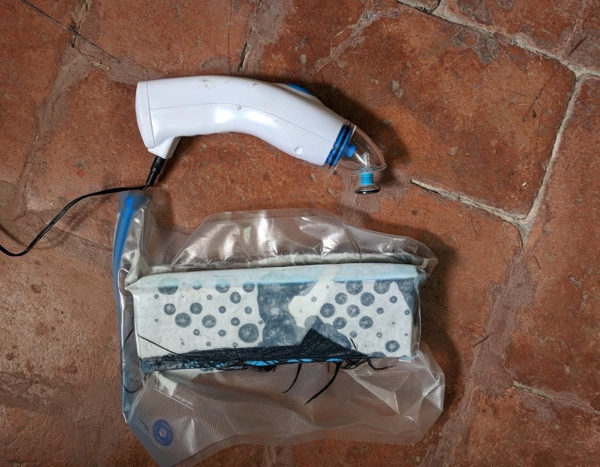
Finally, I covered the panel holder tubes with carbon fiber layers and epoxy, and attached it to a mold with the shape I wanted for either panels or canvas or both, and put that into a food-storage vacuum bag. I switched to the food-storage vacuum bags so I could make a few at the same time. It works as well as my regular vacuum pump.
Making smaller carbon fiber mast clips with a food-storage vacuum bag
For the attachment on my Senz umbrella, I similarly wrapped both the cut-down umbrella shaft and the mast in carbon fiber, stuck them both into a vacuum bag, and then sanded everything down.
Custom carbon fiber mast attachment for my Senz umbrella.
As I mentioned last time, I’m not convinced this set-up is all that superior to a cigar box attached to an aluminum tripod easel, but I have a working system now so I’ll stick with it. Here are a couple of shots of my set-up in the field:
Small carbon fiber pochade set-up in the field.
Carbon fiber plein air painting system with a Senz umbrella.
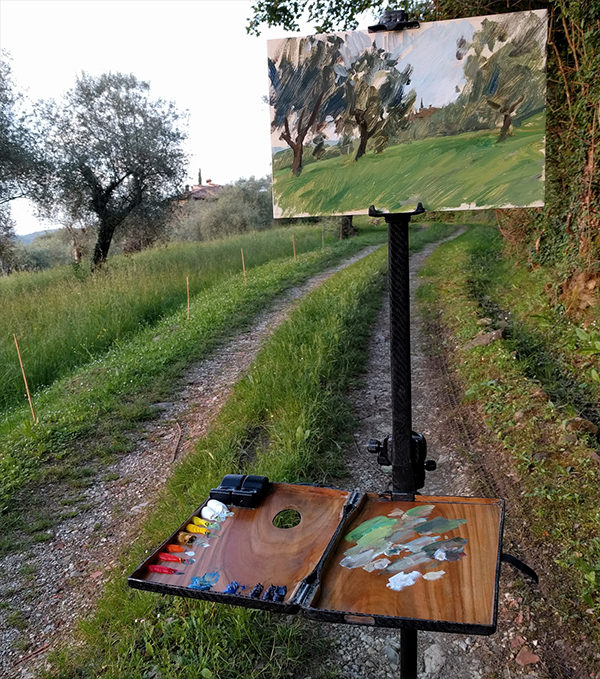
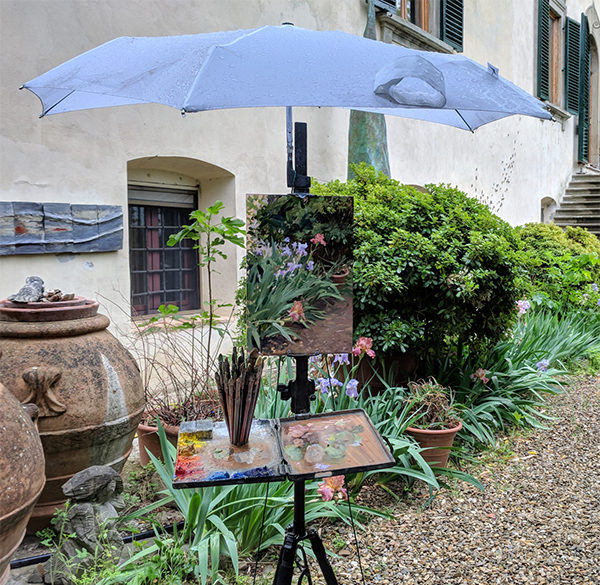
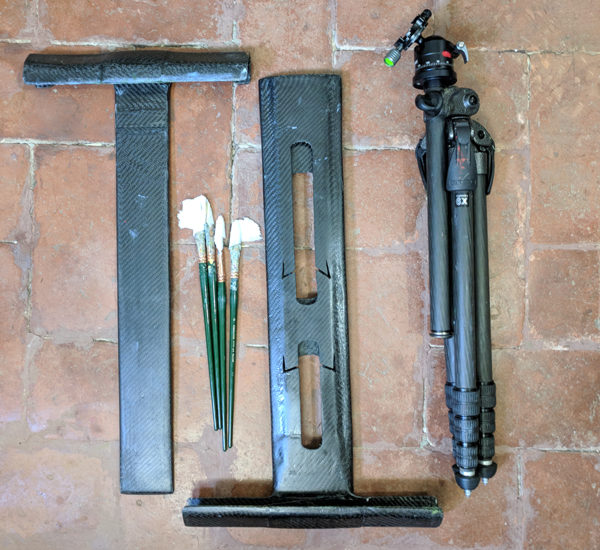
The one area I have had great success with carbon fiber equipment is for larger, relatively lightweight easels. The one I currently use is shown in the photos below. It packs down small enough to fit into my suitcase, but expands to take up to a 47″ (120 cm) vertical stretcher bar. It attaches to a large Gitzo tripod via a heavy-duty ballhead. I also built a larger folding palette that I can both use in the studio, and then carry into the field and hook it to my smaller mast on the Sirui tripod. This way I’m always using the same paints, whether I’m working inside or out.
Larger carbon fiber easel design.
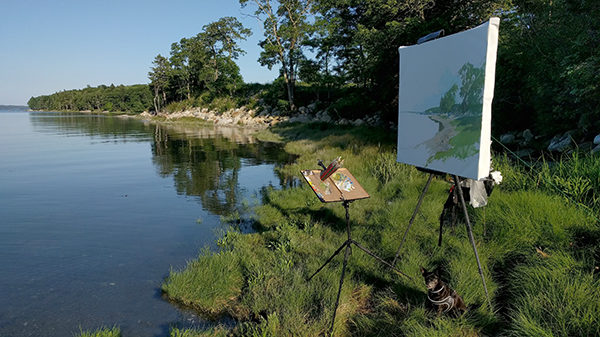
My kit on site in Maine.
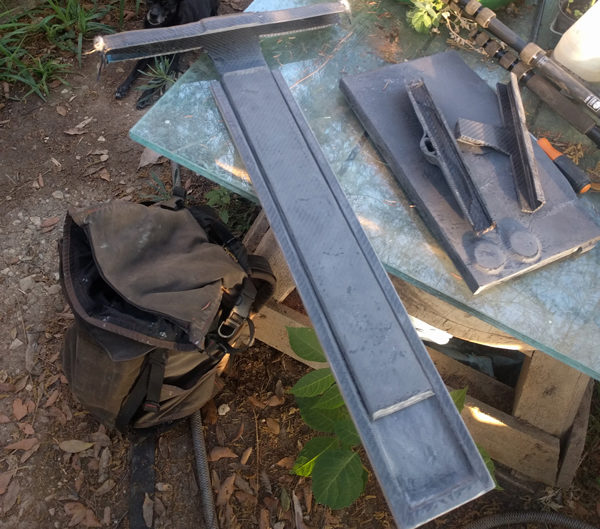
To make the larger easel, I cut the shape of the masts in balsa wood, and wrapped them with carbon fiber and Nomex honeycomb. The top and bottom wedges to hold the canvas were wrapped around a mold to get the shape. I did it in three steps to get the parts to fit together.
Larger carbon fiber easel in a vacuum bag.
After the second stage of building a large carbon fiber easel.
The finished easel. Brushes for scale.
My carbon fiber half of the easel weighs in at around 2.5 lbs (1.2 kg), and I attach it to a very sturdy Gitzo GT2541EX which is 4.1 lbs (1.8kg). I got a tripod with the column that can be set at any angle with the hopes I could avoid buying a ball head, but it hasn’t really worked out. To get enough height in some situations I need the column up pretty high and have to use a ball head to keep the easel perpendicular to the ground.
My next customization will be to attach webbing and a buckle system to both the easel and my backpack, so I can quickly attach and detach it, as well as carry my large canvases on my backpack. The two camera tripods fit into the pockets on my backpack.
Overall, it’s been a lot of work to get this system going. A few people have asked me to go into production with these but, for the moment, it’s too much work for me to produce even one working model. Maybe if I can find a partner to make them, I’ll look into it. In the meantime if anyone wants to use any of my ideas for their own projects, go for it. As I said earlier, you’re not missing out not using a carbon fiber easel, but they are very lightweight and (I think) they look pretty cool.