Technology, Oil Painting, and Tim’s Vermeer

Last winter, around the time that plein air landscape painters migrate back into their studios to begin enlarging sketches into larger finished pieces for the coming year’s exhibitions, I was thinking a lot about this painting entitled Lake, Rus by Isaac Levitan.

Isaac Levitan's landscape painting of an invented lake in Russia.

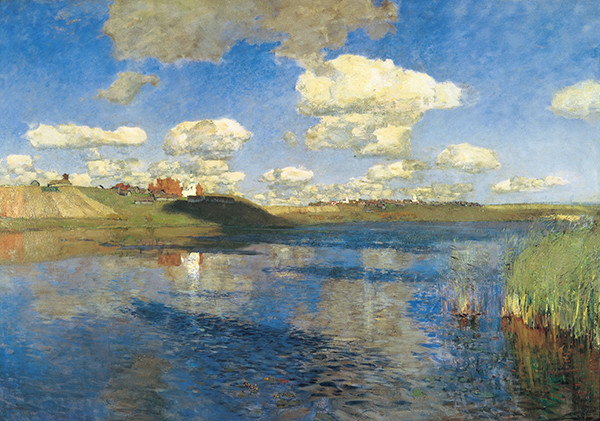
Isaac Levitan. Lake, Rus (1900).

It’s a large landscape and, like many larger paintings, the artist made a number of small preparatory drawings and oil sketches for the final piece. The studies I have seen for this piece have a wonderful freshness to them and a great sense of light, place, and the eternal captured in a moment.

What I find most interesting about Lake, Rus though is that the place doesn’t exist. None of these studies, nor the final piece, were done from life. There was no proportional comparison, no sight-size, no photo reference, and no camera obscura used in the making of the painting. It’s a very different method of picture making than my own, or that of many painters I know.

Artists often disagree about the techniques and materials used by historic painters. In what’s referred to as confirmation bias, their beliefs regarding the working methods of these long-dead artists often conveniently coincide with their own preferred painting system. For example, some artists who use photographs (or who can’t draw well without them) believe the great historic painters all used photography or another optical device like a camera lucida or obscura. Artists who use sight-size have found (some say inconclusive) evidence to prove that sight-size was a common portraiture technique dating back to the Italian Renaissance. Painters who use a grisaille technique are convinced the same method was used for some of the best oil paintings in the Western Canon (this is probably true), and so on. 

In the past couple of decades there has been a lot of media attention around the idea that the Old Masters couldn’t draw or paint without the use of some sort of optical aid, be it a camera lucida, camera obscura or some other mirror/lens combination. Much of this started with David Hockney’s book Secret Knowledge and his subsequent media crusade. I read the book and saw him give a talk in Florence. Like the camera-obscura proponents before him, he has little evidence to support his assertions and his sentences in the book often start with some variation of “I think…” or “It seems to me…”. Overall, it’s an amazingly unscientific book, though the reproductions are beautiful. Other writers have disproved his thesis already, so I won’t go much into it. That said, I would like to reiterate that during the 20th century, despite the plethora of technological advances, the best realist painters have continuously avoided using any optical aids. In portraiture, where an accurate likeness is of the utmost importance, every account describes great artists like Sargent, Zorn, DeLaszlo, and Annigoni working directly from life for important commissions, even if they were known to use photographs for less important work. If photography or optical aids were so useful, why wouldn’t these artists use them for their most stressful and prestigious projects? Today, if we look at the best contemporary naturalistic painters, artists like Antonio Lopez Garcia, Richard Maury, Joseph McGurl or Jacob Collins, all of whom are able to produce excellent naturalistic images with accurate shapes and ‘photographic’ value ranges, these are the very same painters who eschew or minimize the use of photographs, projections, or other technological devices in their work.

Unfortunately, despite the fact that almost every art historian, realist painter, and visual scientist has rejected Hockney’s theory, there was a media frenzy to promote it and many people have accepted it as truth.

A couple of years back there was a documentary made called Tim’s Vermeer and the genesis of the story came from Hockney’s debunked book. The premise of the film is a rather extreme version of confirmation bias and it tells the story of Tim Jenison, a self-described computer graphics guy with no artistic training, who “uses technology to make realistic, beautiful images” as he sets out to prove that Vermeer also had no artistic training and used technology to make realistic, beautiful images.

I saw the movie a while ago and I remember thinking it must be a hoax. It was made by the magicians Penn and Teller, who used to have a cable tv show called ‘Bullshit!’. In this show, the magicians would take pseudoscience, paranormal beliefs and common misconceptions and subject them to critical thought and concrete evidence in order to show that these ideas are falseMy thinking was ‘why would they then make a documentary which is patently bullshit too?’ It made no sense. I thought that after a couple of years they would come out and admit it was all a joke to show how ridiculously easy it is to sway public opinion to believe anything via mass media. Unfortunately, that appears to not be the case.

People have asked me what I thought of the movie so I figured I’d write about it. The TLDR is that I didn’t like the movie because much of what they claim is either outright false or, at best, misconstrues what we know about Vermeer and historic painting methods.

Early on, the movie makes the statement that Vermeer’s painting are special as there are none of the ‘usual artist’s sketches’ under his paintings (they state “he was some unfathomable genius who could just walk up to his canvas and magically paint with light”). That is not necessarily true. First, there are lots of paints, chalks and charcoals he could have used for his underdrawing which wouldn’t show up in the infrared technology they use to look under layers of oil paint. Only marks made by dark media are revealed by infrared images. Vermeer’s own work entitled The Art of Painting shows an artist painting on a grey-toned ground with the underdrawing done in white chalk which, for example, wouldn’t show up in infrared imagining. Both Vermeer and his wife went through great pains to keep this painting in their collection, which has led art historians to believe it might be a self-portrait. Second, it hasn’t always been usual artist’s practice to do an underdrawing since the egg-tempera days (Velasquez, late Titian, Caravaggio and many of the great 19th-century painters come to mind). And third, we know from studying his paintings that Vermeer’s technique was not just ‘painting with light’ and, like that of many painters in 17th-Century Holland, required lots of glazes over a tonal underpainting. Such a method completely removes any possibility of working a passage in one shot as Jenison does.

To nitpick with smaller examples: They make the claim that a blurred line on the profile of the girl’s back in Woman in Blue Reading a Letter is a chromatic aberration that could only come from a lens. But if it was a defect in the lens he used, why wouldn’t it appear in other paintings? The truth is that anytime an artist wants a form to turn away from the viewer they blur the line. In Vermeer’s painting, if you imagine a razor sharp edge you can see how it would jar the eye. You don’t even have to imagine, just look at Jenison’s final painting. It is quite poor precisely because he makes no attempt to vary his edges. Every edge he paints is sharp as he is shown focusing on each edge at a time in a piecemeal fashion, without any relation to the whole image. This is not the way the human eye sees and clearly not the way Vermeer painted.

The glow that they find so magical (“like an image on a movie-screen”) is probably a resin-based, maybe amber-based medium, and lots of artists from the 17th-century get the same effect in their work. In fact, when you walk through the Louvre, as you leave the late 18th-century Rococo rooms with the Greuzes and Le Bruns and move into the first Neoclassical room with the Davids, it’s interesting to see the switch from those earlier rich and unctuous mediums to the more simple and dryer-looking linseed-oil based mediums that have remained common up to today.

At another point in the movie they state that it is impossible for artists to see subtle value shifts across a wall in relation to the whole image. The filmmakers show an animation demonstrating that people can easily see value differences when two squares are close together, but that it becomes more difficult to discern the difference when the squares are further apart. Like so:

Tim's Vermeer value demonstration.
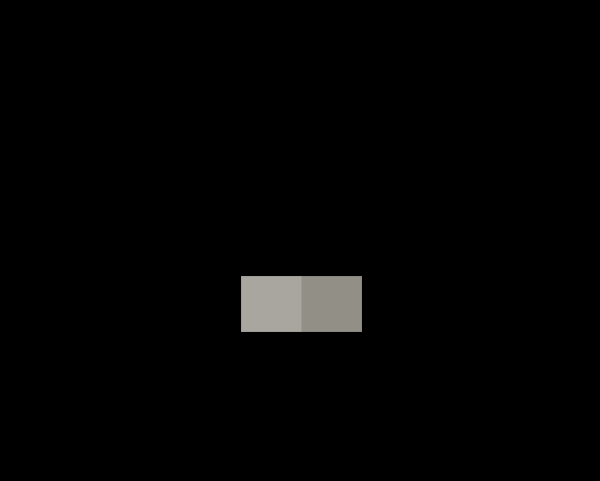
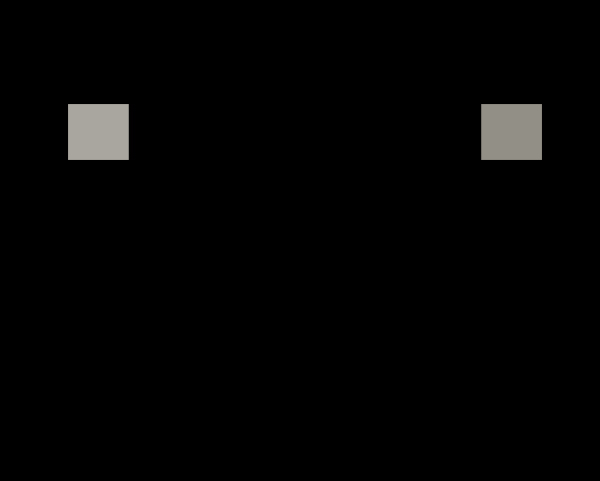
The film claims that Vermeer could only see these value differences if he was some sort of savant, or he had a special super-human retina, or he used their lens. They call it ‘absolute brightness’ (like musicians have perfect pitch) and claim only a lens would allow a painter to see values properly. This is completely false. Artists squint to see the compressed value range that they can reproduce in paint. You can try it at home. In the second image of the squares above, squinting way down will allow you to see the difference in values almost as clearly as when they are next to each other. The human eye can only see a few hundred value changes at a time, so to get the number of values to a smaller range, where subtle differences are visible, artists squint. They’ve been doing so for centuries, and have written about it in treatises. It seems silly that the filmmakers don’t mention this. There are excellent realist painters working all around the world today, getting ‘photographic’ values in their paintings by reducing the amount of light hitting their retinas by squinting. It’s one of the first things painting students are taught.

Vermeer also painted outside. How would he paint changing light effects and moving subjects, such as the clouds in his ‘View of Delft’, by copying from a mirror?

The movie takes a lot of cheap shots at art historians, and no art historian appears in the film. It’s a bit like climate-change deniers made a documentary denying global climate change and couldn’t get any scientists to appear in the movie. The art historical evidence is inconvenient for them. After Vermeer died, an inventory was taken of his possessions and he didn’t own a camera obscura or lens, or any other optical device. This document is still in the Delft city archives and it describes the other objects in his studio. It’s not mentioned in Tim’s Vermeer. They also claim that historic artists were ‘sworn to secrecy’ and never shared or wrote about their techniques. Again this is false. There are a great many treatises on painting techniques and materials written throughout the history of Western Art and none recommend the use of optical devices in painting. Both Hockney and Tim’s Vermeer continually make the point that their theories are not an attempt to diminish the genius of the Old Masters, but their suggestion that these painters were hiding their methods contradicts that. If using an optical device didn’t make painting easier, why would painters hide it? To me this suggestion of deviousness and connivance on the part of historical artists says more about the characters of David Hockney, Penn and Teller, and Tim Jenison than any of the Old Masters.

Sir Joshua Reynolds, for example, did own a camera obscura. This fact is regularly trotted out by the pro-optical device crowd as proof of artists using gadgets as he had one in his possession when he died and it’s still on display in London. What they miss though is that Joshua Reynolds also wrote a great deal about the making of paintings. These writings are collected in his Discourses. In the book Reynolds discusses all aspects of drawing and painting from the technical to the philosophical, but only mentions the camera obscura once, and he pans it:

“If we suppose a view of nature represented with all
the truth of the camera obscura, and the same scene
represented by a great artist, how little and mean will
the one appear in comparison with the other…”

Leonardo da Vinci is also suggested as an example of an artist who used a camera obscura. On this page in the Atlantic Codex he illustrates the inversion of an image through a pinhole.  It’s the small sketch of the candle at the bottom of the page. The rest of the drawings on the page are images of optical phenomena and the functioning of the human eye and I’m not convinced he was suggesting its use in painting. In his own work, there is very little stylistic difference between his early work, his fantastical drawings of invented spaces and characters, and any subject where the use of a camera obscura would have been possible. Furthermore, some of Leonardo’s thoughts on art were compiled by his pupil Francesco Melzi into the Treatise on Painting. In the book, tracing shapes using a piece of glass is described a few times, as well as the practice of observing ones work with a mirror to check shapes, yet there is no mention of the use of a camera obscura.

He does, however, specifically warn his readers not to copy the subject the way Tim Jennison does:

“The painter who draws merely by practice and by eye, without any reason, is like a mirror which copies every thing placed in front of it without being conscious of their existence”.

One can go on through the various artistic treatises, but they are all silent on the use of gadgets. What every text written by a painter does repeat over and over is the importance of learning to draw over the course of years.

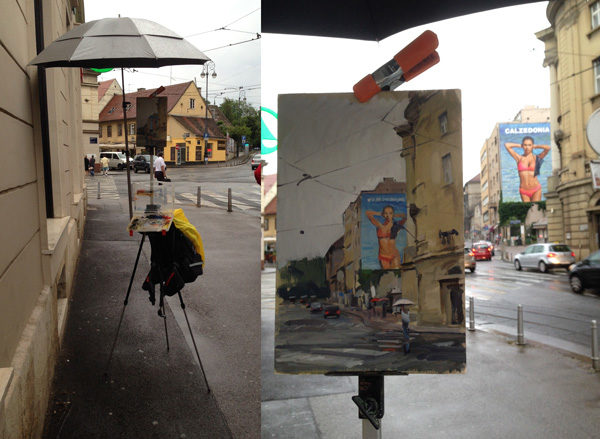
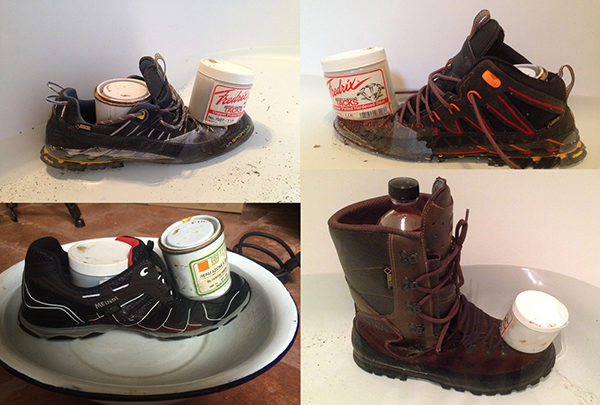
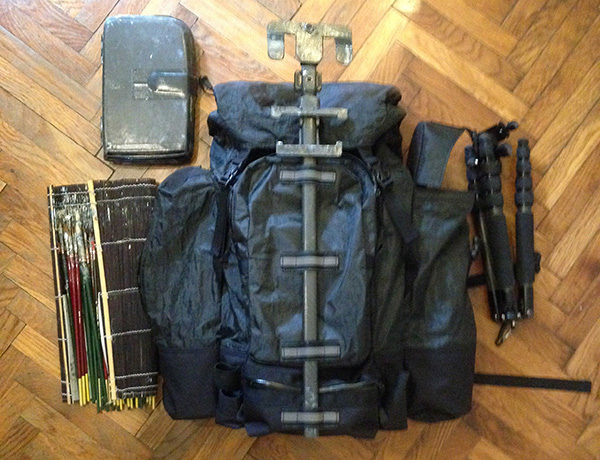
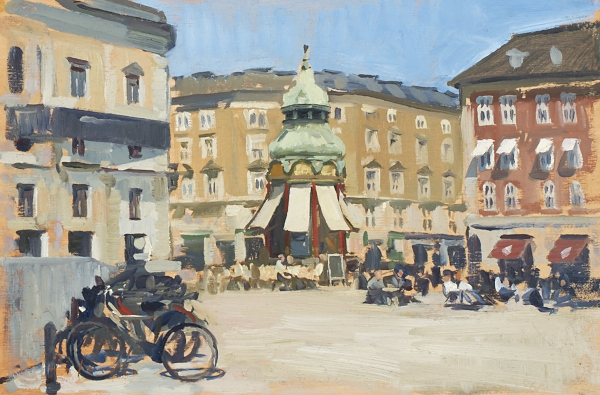
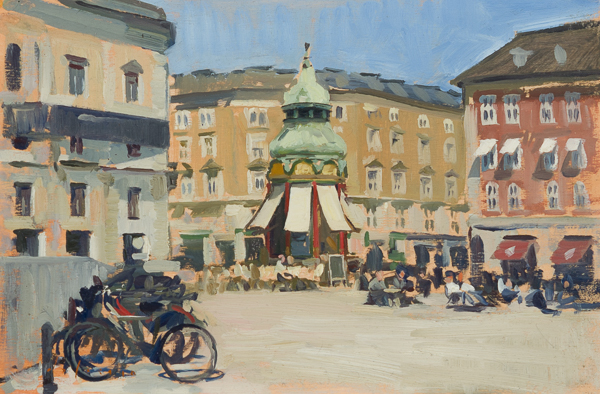
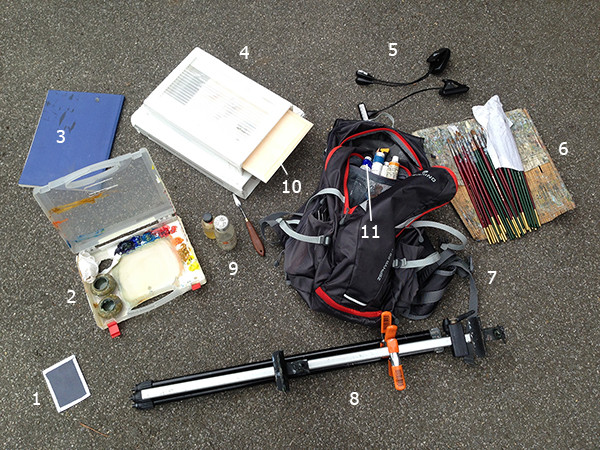
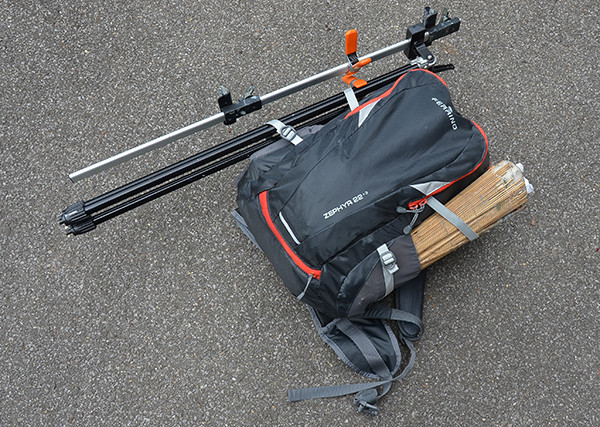
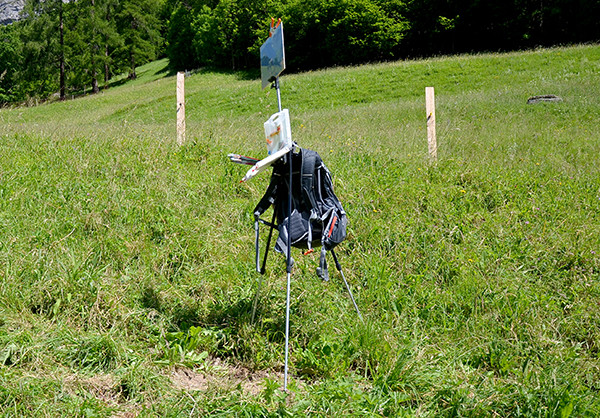
Despite this rant, I am not against the use of technology to make art. I don’t think we should go back to horses for getting to landscape painting spots (though moving slow and being high up is great for scouting), I love looking at the new wave of digital artists I see online, and I will incorporate technology into my own working method to experiment with new ideas. I’ve written before about using video rather than photography for portraiture, experimenting with carbon fiber and Dyneema composites fabric to lighten my plein air painting equipment, and I use weather, map, and sun-tracking apps to plan my outdoor work. I’ve also used Photoshop on occasion to make compositional decisions quickly, rather than doing lots of studies, as seen in the gif below:


Because I use technology sometimes in my work, I am well acquainted with its disadvantages, of which this gif is a good example. My thought here was that since I was able to quickly and precisely move elements around, in theory I would be able to produce a better painting. In reality though there is evidence to suggest that I would be better off doing a number of small studies by hand. Cognitive psychologist Robert Bjorkhe called the principle ‘desirable difficulty’ in his studies on teaching methods, and his discussion of ‘Generation’ is especially relevant. The idea is that generating words, rather than just reading them, helps students remember them better. I believe that artists generating studies also contributes to an understanding of the work that will be different than if the same work is done using technological shortcuts. There is a depth that we get into when spending painstaking amounts of time on an idea that will not be there when using technological shortcuts. It seems commonsense to suggest that doing a number of studies will give an artist more practice and better help them visualize and remember their subject, but we sometimes forget just how much of painting is memory. For a realist painter recreating an image before them, every brushstroke is based on a memory. For Levitan, recreating a whole scene in his head, he would be required to call upon a large vocabulary of objects from memory, and visualize them in a specific light and atmosphere. 

I’ve often wondered how our brains have changed over the centuries as we rely less and less on memorization in other areas of our lives. There used to be elaborate systems based on visualizing spaces which were used as memory tools (Frances Yates wrote a great book on the subject called The Art of Memory), and perhaps historic artists were also using these ‘memory palaces’ to store information they might have access to on rare occasions. It would have required years of practicing imagined spaces. Would that have wired their brains differently than ours? For those of us living in a digital age, we don’t really have to remember much at all. We carry the sum total of human knowledge around in a tiny device in our pocket. When you read about the concerns of scholars after the invention of the printing press – that people would lose the art of memorization that was so essential in the days when seeing a manuscript might be a once-in-a-lifetime experience – you have to wonder what they would think about our lives today. We are also bombarded by images in the form of tv and movies, public advertising, newspapers and magazines, and now the internet. Is that going to make us less sensitive to images or more sophisticated with regard to them? Studies show that reading short internet articles and blog posts (!) reduces our attention spans, and I personally notice a difference in my thinking when I stay offline and go back to reading books. How does all of this affect our work? And is relying on technology to make painting easier really producing better artwork? 

This is the point that I’m really trying to make here: On the one hand, art is a craft and, like any craft, mastery comes from really hard work. There aren’t any shortcuts. Years of exercise in the form of thoughtful repetition and copying leads to a visual and physical dexterity which allow an artist to create the work of art. 

On the other hand, there is an emotional component to great art which comes from the artist’s love for their subject. The subject can be their passion, idea, or just their reaction to the beauty of light on the world around them. They create these works either from visualizing the world around us, or reinventing it in their head. When an artist shares this with visual honesty and thoughtful expression in their medium of choice, it is a special form of communication between them and the viewer of the work. I believe art is one of the few ways of successfully sharing the sensation of a powerful emotion between two people, sometimes over the span of centuries. But this requires time and a situation where the artist will feel moved by their subject.

To return to confirmation bias, Penn and Teller are magicians and entertainers. Part of their shtick is that everything in magic is smoke and mirrors. Their movie, Tim’s Vermeer, is an attempt to prove that Vermeer’s art was also just smoke and (literally) mirrors. Tim Jenison is also operating under an almost pathological confirmation bias. In the movie he claims that when he looks at a Vermeer he sees it as a still from a video camera. I disagree, and using my own confirmation bias (combined with more evidence, experience, and using Occam’s razor) I would like to suggest that Vermeer had excellent training, spent a great deal of time learning to draw, and worked very hard over long periods of time to make his beautiful paintings. He painted in grisaille and glazed over it, perhaps repeatedly. But most importantly, he felt a strong emotional reaction toward the light falling on his subject, and I don’t believe that can happen looking at a subject upside down in a black box or reflected bit by bit in a mirror. 

In art, the end does not justify the means. The means are an essential part of creating art in the first place.

Plein Air Painting in Rain

Plein air landscape painting in heavy persistent rain in Plyos, Russia.

Painting in the rain in Plyos, Russia.

There are inspiring natural effects which take place in weather which is not really suited to plein air painting. I wrote earlier in the year about painting in snow, rain is another such condition. For cityscapes and roads especially, painting while it is raining can offer reflections in the wet pavement which make for some wonderful designs and unusual compositions.

Plein air landscape painting of Broad Street in Charleston SC.

After the Rain, Broad Street, Charleston. 12 x 8 in., oil on linen.

Plein air painting of the Fin-de-Siècle Museum in Brussels.

The Fin-de-Siècle Museum in the Rain. 30 x 20 cm, oil on panel.

There are, however, difficulties with using oil paint in heavy or persistent rain. First, when the painting surface is covered with a sheet of water it can be difficult to get the colors to stick. Then poorly mulled paints can bleed with the water. Next, heavier drops of water can hit the delicate paint layers, leaving small craters in the color or washing away the paint altogether. And finally, with enough perseverance, one discovers that the the old adage ‘oil and water don’t mix’ is only partly true: Oil paint will eventually mix with the water to form a thick emulsion which can be difficult to control.

The obvious solution to this is to keep water off the surface, either by painting somewhere with shelter or to carrying one’s shelter to the spot. A top-hinged trunk door can work very well for painters with one on their car (thanks Roy), as shown in this photo of my set-up under the trunk of a car on the Hardangerfjord:

Using the trunk door of a car as a plein air painting shelter.

Using a trunk door as a portable painting shelter in Norway.

Recently I built a small, lightweight rain-bonnet which attaches to my easel above the panel. As I wanted something that would fit in my backpack the set-up is quite small. It works fine in normal vertical rain, but isn’t all that successful with the horizontal and upward-directed rain that you get in places like Ireland. Once I’ve tweaked it to better functionality I’ll try to get them out to the public.

Plastic cover for landscape painting in the rain.

Rain bonnet for plein air painting in rain.

Another option is an umbrella. I have an Easyl umbrella from Artwork Essentials, which is made from opaque cloth and designed for blocking sunlight, not rain. The problem with an opaque or dark umbrella in the rain is that it blocks what little light is filtering down from above. This can be especially problematic when painting in cities or forests where much of the ambient light is already blocked from the sides. A better solution would be a white umbrella like the ones made by Best Brella. While I have no personal experience with their products, I’ve seen painters with other clip-on white umbrellas and they let in adequate light for keying values properly.

Photo of a plein air painting umbrella blocking too much light.

Dark umbrellas block too much light in overcast conditions.

A serious problem with painting in heavy rain is that it can absolutely ruin materials. For brushes, the thickness of the emulsion and water sinking into the wood handle can expand the metal ferrule which, in turn, causes hairs to come out and destroys the form of the head. When working outside in dry weather I can get away with washing my brushes once a week if I use them everyday. When painting in heavy rain I find I need to get the paint and water out of the brush at the end of every day, and even then some don’t make it.

I haven’t had problems with wet panels warping, but I have seen water soak the linen and cause it to shrink. This can lead to bending of the stretcher bars as seen in Leo Mancini-Hresko‘s photo below. The solution would be heavier stretcher bars with a crossbar, and/or restretching the canvas after the painting is finished.

Photo of a warped canvas due to shrinking linen from painting in the rain.

Warped stretcher bars due to the linen shrinking while drying.

As for rain clothes, there are better sites to peruse for gear. I’m personally a fan of Gore-Tex Paclite as it’s cheaper than, and doesn’t breath as well as, the fancier alpinist/backpacker stuff. I find that clothes that don’t breath well are better for us stationary landscape painters, yet some venting is better so it doesn’t feel suffocating or clammy. I have an old Patagonia Paclite jacket that I’ve used for a number of years if I know it’s going to rain. I wash it and reapply Grangers waterproofing once or twice a year. As I mentioned in the post on winter clothes, alpinist and climbing jackets are stitched together in a way to minimize the pull on your sleeves when you lift your arm. This works better for painters than normal jackets as we also keep our arms up much of the time. A dark and/or blue jacket is also a good idea for painting en plein air as it wont reflect a strong color back onto the canvas if the sun comes out.

I’ve experimented recently with a lightweight Helium II from Outdoor Research and one of the new Derzimax jackets from Bergans of Norway. Neither was particularly impressive, the Helium packs small and weighs little, but it wets out quickly and feels clammy. The Derzimax jacket keeps me dry, breaths well (which can feel cold when stationary), dries quickly, but weighs four times as much as the Helium, and twice as much as my Patagonia. 

Painting in freezing rain can be a problem as one needs all the warmth of insulating layers, with a waterproof shell on top. In the past I found the only way to do this was with the aforementioned layers or a very heavy parka, both of which are constricting and heavy, and annoying to paint in. This year I picked up a lightweight Crux eVent down jacket from Up and Under in Cardiff (great UK gear store), which should be both warm and waterproof for painting in winter rain. I let you know how it works out. eVent is suppose to have problems if it gets dirt or grease on it, and I assume the same would go for oil paint, but it was the only lightweight, articulated-shouldered, one-jacket solution I could find.

Plein air painting in the rain on Curracloe Beach, Wexford.

Painting in the rain on Curracloe Beach in Ireland.

For rain pants I use a Berghaus Paclite shell that can be found pretty inexpensively on Amazon.co.uk.

Testing the waterproofness of Meindl and La Sportiva shoes and boots.

Bathtub test: Meindls (bottom) didn’t let water in after hours, La Sportivas (top) leaked like sieves.

It took me forever to find actual waterproof shoes that were light enough to travel with. While I love the grippy soles of La Sportiva approach shoes and trailrunners (red Frixion soles), their Gore-Tex iterations are a trainwreck . When wearing them my socks will get wet after crossing a lawn covered with dew. I’ve had good luck with Meindl boots so I’ve been using their X-SO 30 shoes with Gore-Tex Surround and, combined with waterproof gaiters, they keep my feet dry for hours in the rain. The downside to Meindl is they can be hard to find, expensive, and they look like they were designed by a 1980s glam rock group. On the plus side they’re still made in Germany and last for years.

Photo of a custom-made cuben fiber backpack for plein air painting.

Custom cuben fiber backpack for painting equipment.

For keeping my gear dry, I had a Cuben Fiber (now Dyneema Composites Fabric) backpack made by an artisan in Florence. My main interest at the time was actually to keep medium and turpentine from getting out of the backpack, should something leak. But the Cuben Fiber is completely waterproof, so my paintings and brushes are protected once they get back into the bag. I was a bit concerned about how Cuben Fiber would react with the medium and especially with the turpentine, but it’s worked great so far. I’ve used it daily for six months with turpentine and medium on the inside and outside of the bag there are no ill effects. It wipes off easily too.

If anyone has other thoughts or suggestions, I’d love to hear them in the comments.

Winter Gear for Plein Air Painting Part II

Winter clothes for plein air landscape painting.

My 2016 winter kit.

“There’s no such thing as bad weather, only unsuitable clothing.”

― A. Wainwright

Last year I wrote about the problems I was having painting outside in the Austrian Alps in February due to inadequate winter gear. This post is about some of the solutions I found after researching and purchasing kit this year. The listed price on some of this stuff is pretty high but buying in spring and summer, using sites like Steep and Cheap or Ebay, and finding an online store that I’m pretty sure had listed the wrong prices (they’ve since fixed them) allowed me to pick up most items for a fraction of the normal cost. And some items are just well worth the money.

My goal getting this kit was to be able to work outside all year without feeling any discomfort, despite the fact that I get cold really easily. I’m really happy with my current setup. It also breaths well so I can trudge around in the snow looking for my view without getting too hot. Furthermore, merino and down both regulate temperature rather than just insulating so I find I don’t have to change in and out of layers as the sun and/or wind comes and goes.

  • The Belay Jacket. A belay jacket is used by alpinists when they have to stop and wait around while climbing mountains. The advantages for plein air painters are threefold. First, the design of the sleeves is to allow for unrestricted movement while climbing (called articulated sleeves). This means that when painting you wont fight your sleeve. The second plus is that they are incredibly lightweight as they are usually stuffed into a stuff-sack and carried up the mountain. They use high-loft down or modern synthetic insulation (you can read about down and synthetic down jackets here) and this, combined with the articulated sleeves, means you really can’t feel the jacket at all when you’re holding your arm up. A normal winter jacket or parka will often have a noticeable pull. The real-world result is that I haven’t had my usual sore shoulder for a few days when I switched to a jacket this year. It’s not that big of a deal, but it is something to consider for anyone looking to pick up a dedicated winter plein air coat. The third thing about belay jackets is that they are very warm so you don’t need many layers to stay warm (though most decent winter jackets do fine here). Mountain Hardware, Rab, Arcteryx, Patagonia, and other mountaineering-gear companies all make belay jackets or parkas. For cottage companies, PHD (England), and Feathered Friends, Montbell (Japan), and Nunatak in the US are also making belay and expedition jackets and parkas. There are both down and synthetic versions. I went with down for the weight to warmth ratio. The synthetic ones will keep you warm even if they get wet, which seems to me to be more of an issue if your life depends on it high up on a mountain. 

    Update for 2020: I’ve switched to a waterproof Crux Magma and it’s much better. The problem with many belay jackets is they’re design for use with a shell in rain or snow, but for a painter you lose too much dexterity with two layers. The Crux has great mobility in the shoulders and is incredibly light and warm. And it’s completely waterproof, so you don’t have to worry about staying out too long in precipitation.

  • Mid-layer Sweaters. I bought a couple of ‘technical’ merino sweaters of different fabric weights that I switch depending on the temperature. They’re not stiff like some of the heavy sweaters I wore in the past to make up for my jackets never being warm enough. My favorite is a Bergans of Norway merino wool sweater that was reasonably priced and has a half-zipper to regulate the temperature better. It also comes with thumb-holes in case I ever need to do whatever it is you need thumb-holes for.

    Update for 2020: Yak Wool sweaters from Khunu are much warmer for their weight than merino. Unfortunately they sell out quickly. I will wear a fleece over the sweater when it’s really cold.

  • Merino Base Layers. I had a hard time finding expedition weight pure merino base layers in stores in continental Europe. As I mentioned last time, synthetic base layers are more designed for very active use, where wicking away sweat is important. For standing still the best thing I’ve found is a heavy weight merino base layer. This year I’m using 260 weight (gsm) leggings from Icebreaker and a 340 weight Deep Winter Base Layer top from Rapha, an English cycling gear company. The Rapha base layer is pricey but if you consider it’s also a balaclava and neck gaiter, as well as being a very high-quality piece of kit, it’s pretty reasonable. I’m very happy with mine. It’s one of the only things I paid full retail price for and I feel it was well worth it. Minus33 makes heavier duty baselayers (400 gsm), but we can’t get their stuff over here. Woolpro is a cottage company making merino gear in the US. 

    Update for 2020: I’ve switched to yak wool baselayers from Kora and find them warmer than merino for the same weight.

Image showing the size difference between Harkila Inuit pac-boots and normal insulated winter boots.

Size difference between Harkila Inuit pac boots and normal winter boots.

  • Pac Boots. I’ve always gotten by with cheap hiking boots with hand warmers stuffed in the toes. Other painters use normal insulated winter boots with their car mats or a piece of foam under their feet as most of the cold comes from touching the freezing ground. I wanted something that I could work outside for hours in without carrying extra gear so I picked up a pair of real pac boots based on Stapleton Kearns‘ recommendation of The Cabelas Trans-Alaskan III Pac Boots. Since we don’t have Cabelas in Europe I bought the similar-looking Harkila Inuits for the around the same price. They’re comically large boots, and online images don’t really show how big they are. You can’t drive while wearing them, so for scouting with a car one still needs a smaller winter boot to use the pedals safely. Like all pac boots, they’re actually two boots in one as there is an inner wool insert that your foot goes into, then that goes into the larger boot. They also have two insoles below the insert and my feet are kept about 4 inches (10 cm) off the ground. Despite the large size, the boots are actually very light and manageable for walking as the insoles are foam and the sole of the boot appears to be hollow, perhaps to insulate better. The important part is that I can stand for hours on snow and ice in complete comfort.
  • Primaloft/Coreloft pants. A number of companies make insulated pants, again mainly for belaying mountaineers. The difference between these and insulated ski pants is that they lack the Goretex or other durable waterproofing. I bought a pair of Arcteryx’s Atom pants made from their proprietary Coreloft insulation and it really feels like some sort of futuristic fabric. When you move the pants feel slightly cool on your legs so you don’t get warm, but when you stand still they really insulate well. They don’t swish when you walk like ski-pants and they look pretty discrete for working in them in the city. They were also significantly cheaper in Europe than the US for some reason. I have a Gore-Tex shell for when it rains and a good thing about dividing the insulation and the shell is that I can tune the clothes for the temperature better. I also use the shell for rain in warmer weather.
  • Flannel-lined pants. I bought a couple of pairs of flannel-lined pants and can’t believe I’ve suffered through European winters for 25 years without them. Besides being incredibly warm, they’re so comfy. It’s like wearing pajamas all day. I live in these now. I have a pair of Pranas and Craghoppers, the Pranas are much nicer as the lining is pure cotton and doesn’t cling to your legs. The Craghoppers are warmer as the synthetic material use doesn’t breathe as well. The Pranas cost twice as much. That said, for painting outside in the snow, I prefer the Coreloft pants as the side zipper makes it easier to switch from car-friendly shoes to pac boots.
  • Primaloft hats. The hood on the Jottnar jacket is very warm but I prefer wearing a hat so I can keep my peripheral vision. Outdoor Research, Montane, and Millet all make radar-style hats out of Primaloft (probably other companies too). I have the Millet one and insulates well, is water-resistant, and still breaths. I also think I look very French in it, which is always a good thing when painting outside.
  • Gloves for the non-painting hand. Update for 2017: I’ve switched to bicycling gloves for the non-painting hand. Garneau, Pearl Izumi, Castelli, Rapha, ect… all make gloves for bicycling in winter and I find that they have better dexterity and grip than ski or alpinist gloves.

    Down Hibbard Mitten for plein air painting in extreme cold.

    Custom-made down Hibbard mitten from Luke’s Ultralight.

  • Custom-Made Down Hibbard Mitten. In the past I’ve used a wool scarf sewn into a thumbless-mitten-shape to keep my painting hand warm. The design is called a Hibbard mitten after Aldro Hibbard who painted a lot outside in the New England winters. (Update for 2018) I had one made by Goosefeet Gear, a custom down-gear maker. It works great. It’s very warm and weighs only half an ounce (15g) so you barely feel it on your hand. It also comes with a removable waterproof shell for snow and rain. I should mention that with any Hibbard mitten I don’t wear it the whole time. I prefer to keep my hand exposed to handle the brush better, when it gets cold I put the mitten on until it warms up enough to take it off again.

More on Color Calibration for Photographing Paintings

ICC Color Camera Calibration for photographing artwork.

The CoCa interface.

A quick post on calibrating color for photographing paintings. I wrote a longer post in 2014 on photographing paintings with a DSLR using a Colorchecker Passport, Adobe DNG profiles and Adobe Lightroom. That system has worked well for me for the last couple of years, but recently I wanted to use Phase One’s Capture One Pro as I find it to be superior to Lightroom for my needs. The problem I previously had with Capture One was that it doesn’t use the DNG profiles that the Colorchecker Passport software creates.

The only solutions I had found for making ICC profiles were very expensive. The oft-recommended PictoColor InCamera is a ten-year-old plug-in that sells for $200. You then have to find a copy of Photoshop 5.0 to use it with as it’s still 32-bit. There are a couple of other solutions that cost even more.

Enter CoCa, the freeware ICC Color Camera Calibrator. The software works with a number of physical color reference cards. One inexpensive one that I picked up ($30 plus shipping) is the IT 8.7 Calibration Target from Wolf Faust at coloraid.de. It’s the C1 order number on his website (it says it’s for cameras, not scanners) and the package comes with the printed target as well as a CD with the reference files.

The IT 8.7 target from Coloraid.de.

The IT 8.7 target from Coloraid.de.

The CoCa webpage has instructions for the software but to sum it up briefly: You first photograph the calibration target under your lighting set-up, then crop it and save it as a TIFF file in your camera’s software. Next, select the image in CoCa, then select the target type and the reference file from the Coloraid CD (R131007.txt). Finally, save the ICC profile in the proper folder so your software can use it (for Capture One it is explained here). You can then apply it to your paintings in whatever software you’re using. For Capture One it gets applied via the Base Characteristics box under the Color tab.

CoCa should work with the Colorchecker Passport too, though I haven’t tried it.

For those using OSX, you can run CoCa through Wine though the process is somewhat complex and requires that you’re either handy with command line interface of Terminal or, like me, reasonably good at following instructions and copying and pasting.

A few people I’ve discussed color calibration with have balked about the high prices for calibration gear. In my opinion, this works out to be a good solution for a bit of time and $35 ($40 in the US).

Below are a couple of images of a painting of mine for comparison:

Photographing artwork with Coca and a coloraid.de IT 8.7 calibration target.

CoCa with a Coloraid IT 8.7 target and Capture One Pro.

Image of a plein air landscape photographed with a Colorchecker passport calibration card.

Colorchecker Passport with Adobe DNG and Lightroom.

Ultralight Plein Air Painting

2018 Update: This post has been updated with newer information here.

Ultralight plein air landscape painting gear discussion.

♫ The hills are alive… ♫

Trudging through the snow in the Alps this February, I decided that my plein air equipment was annoyingly heavy and I resolved to lighten it. One major problem outdoor landscape painters have with regard to equipment is that we need it to be wonderfully light while we’re trekking around looking for views, and then we need it to be heavy and stable when we start painting.

I believe that some of this is also just a question of getting used to painting with a different set-up. When I first started landscape painting I used the heavy steel easels made by Fome in Italy. When I tried their aluminum version I found it to be annoyingly unstable. Now I use that same aluminum easel everyday without issues. In my quest for lighter gear I recently tried repurposing a plastic box from a hardware store and had the same experience. The first few times I found it moved too much and seemed unstable, but after sticking with it for a few weeks it works fine for me now.

Having equipment blow over in the wind is a bigger problem, but for most breezes the weight of the backpack is enough to stabilize everything. For heavier winds I think the best solution is to have some way of attaching a weight to the set-up when one arrives at the painting site, and finding said weight there. In nature this usually means finding a big rock and in cities it can mean buying a bottle of water.

This is my current set-up (lighterpack.com link).

Ultralight plein air landscape painting materials.

My ultralight plein air painting equipment.

  1. Black mirror
  2. Plastic pochade box with attached palette cups
  3. Kunst & Papier softcover sketchbook
  4. Home-made wet panel carrier
  5. Night lights for nocturnes
  6. Brushes and brush-holder
  7. Ferrino Zephyr 22 + 3 backpack
  8. Fome aluminum tripod easel
  9. Medium, turpentine, palette knife
  10. Zecchi gesso-primed panel
  11. Backup tubes of paint (just white, the three blues, and ochre)

It clocks in at around 11 lbs, or 5 kg, with the easel.

Ultralight plein air painting kit

Everything packed up.

My focus here is really on having a painting set-up that works for me, the weight is completely secondary. For example, I won’t give up the ridiculous number of brushes I need to paint with. My Kunst & Papier sketchbook is also quite large, but I find drawing compositional ideas in a small Moleskine-sized sketchbook to be restrictive. (Kunst & Papier has much better drawing paper too).

I only carry titanium white, Roman ochre, cerulean, cobalt and ultramarine blue paint tubes with me. The fact is that the cadmiums last forever on the palette. They don’t dry out, and the tinting strength of Williamsburg is such that I use very little over the course of a day. I find there is almost never a reason to have back-up tubes in the bag. (Another solution is just to take half-empty tubes of everything).

I’m currently using Zecchi’s gesso-prepared wood panels in Europe, but I’ll switch to New Traditions’ C12 Claessens-on-gatorfoam when I’m in the US this summer. With the Zecchi boards I use those orange ‘Pony’ clamps to hold the lid of my pochade box and the top of the panel. With New Traditions, the clamps are too strong and will crush the gatorfoam so I switch to lightweight (plastic) photographer’s clips. The New Traditions’ boards are quite expensive, but I know people who are making their own version with their preferred primed-linen attached to gatorboard, dibond, or wood via sheets of Beva 371 thick film (glue) using a low-temprature iron. Linen mounted on gatorfoam is wonderfully lightweight and can be especially useful for avoiding overweight fees on airplanes.

Obviously, the night lights aren’t necessary unless I’m painting nocturnes.

There are a lot of cottage industry companies these days making ultralight backpacks (here is a good list). The problem with many of the ultralight packs is that they’re often huge for what is essentially a day trip for most plein air painters. They’re also usually minimalist with regard to add-ons and pockets in order to reduce weight. I find the bells and whistles to be really useful on a backpack. I also need a gazillion pockets to sort everything. Furthermore, having everything waterproofed is useful as medium leakage is a standard occupational hazard for landscape painters and it’s good to be able to protect the other items in the pack from such an event.

At the moment I’m using a Ferrino Zephyr 22 + 3. It’s not an ultralight pack as there is a frame that pushes the body of the bag away from one’s back which seems relatively heavy. (Frankly, the frame doesn’t seem that well thought out as it pushes too far into the main section so it doesn’t leave a great deal of space inside). I bought it after trying on a dozen or so backpacks in various stores as it was very comfortable and the pockets were the right size for my equipment. It’s been holding up well, but I plan on having one custom made after the summer. I’d like to organize the storage to fit my materials exactly, and in a way where I can quickly access the items I regularly need while working.

Ultralight plein air landscape painting easel and backpack.

My current set-up in the field.

Many pochade box companies advertise a 30 second set-up time. That seems like a lifetime in plein air painting. My set-up is up and running in closer to 10 seconds.

That said, I’d like to try a carbon fiber camera tripod set up. While the Fome aluminum easels are lighter than most good carbon fiber camera tripods, I’m curious to see if I can get more stability out of carbon fiber. I wrote to Manfrotto/Gitzo and asked them if they could make some attachment parts for plein air painters, but they said they only design their equipment for photographers. (What ingrates. A landscape painter invented photography for them, and this is the thanks we get.) I considered writing to Fome too, but after they started putting rubber in the lids of their turpentine cups I have very low expectations of their design team.

There are some great American pochade box makers these days, but based on the weight of the boxes they’re making they all seem to have sherpas carrying their equipment around. I’m also more interested in the cigar-box-with-separate-mast system that I currently use. The pochade box model doesn’t work for sight-size, unless you’re ok with having your nose in your palette.

So, after not being able to find a strong, stable, and lightweight attachment system for a cigar box and tripod, I’m currently experimenting with making my own carbon fiber equipment at home. I’ll post the results in a few days.